In the Maps view, you will see a shortcut menu bar on the left-hand side of the maps screen underneath the zoom buttons.
Adding these items will automatically update the E/M Network Locations, also create Project Tasks.
Associates Boundaries Cabinets Cables CBTS Couplers Distribution Points DP Locations Ducts Manholes Microwaves Network Terminations ONT Patch Cables Poles Properties Special Eng Difficulties Trenches Zones |
|
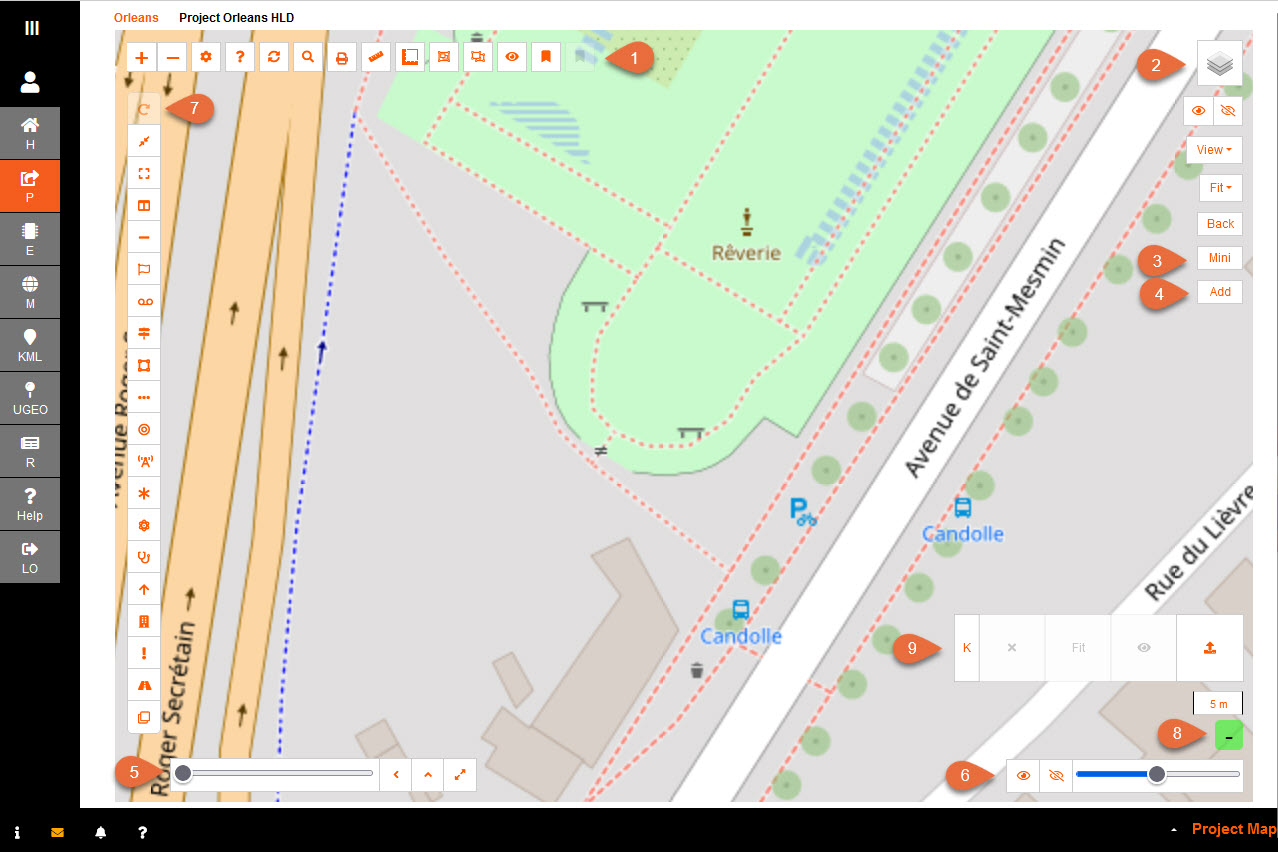 |
There are quite a few features available on the Map function, apart from the toolbar.
Hover over each button on the map; and a brief description of the function is available.
1. Zoom, Advanced Settings, Help, Refresh, Search, Print, Ruler, Measure, Capture, Last View and Global Bookmark
'Zoom In' and 'Zoom Out' is similar to the mouse scroll in and out.

Map Settings:

The Map Advanced Settings pop-up is a useful tool, especially to apply a unique Fastlight experience:
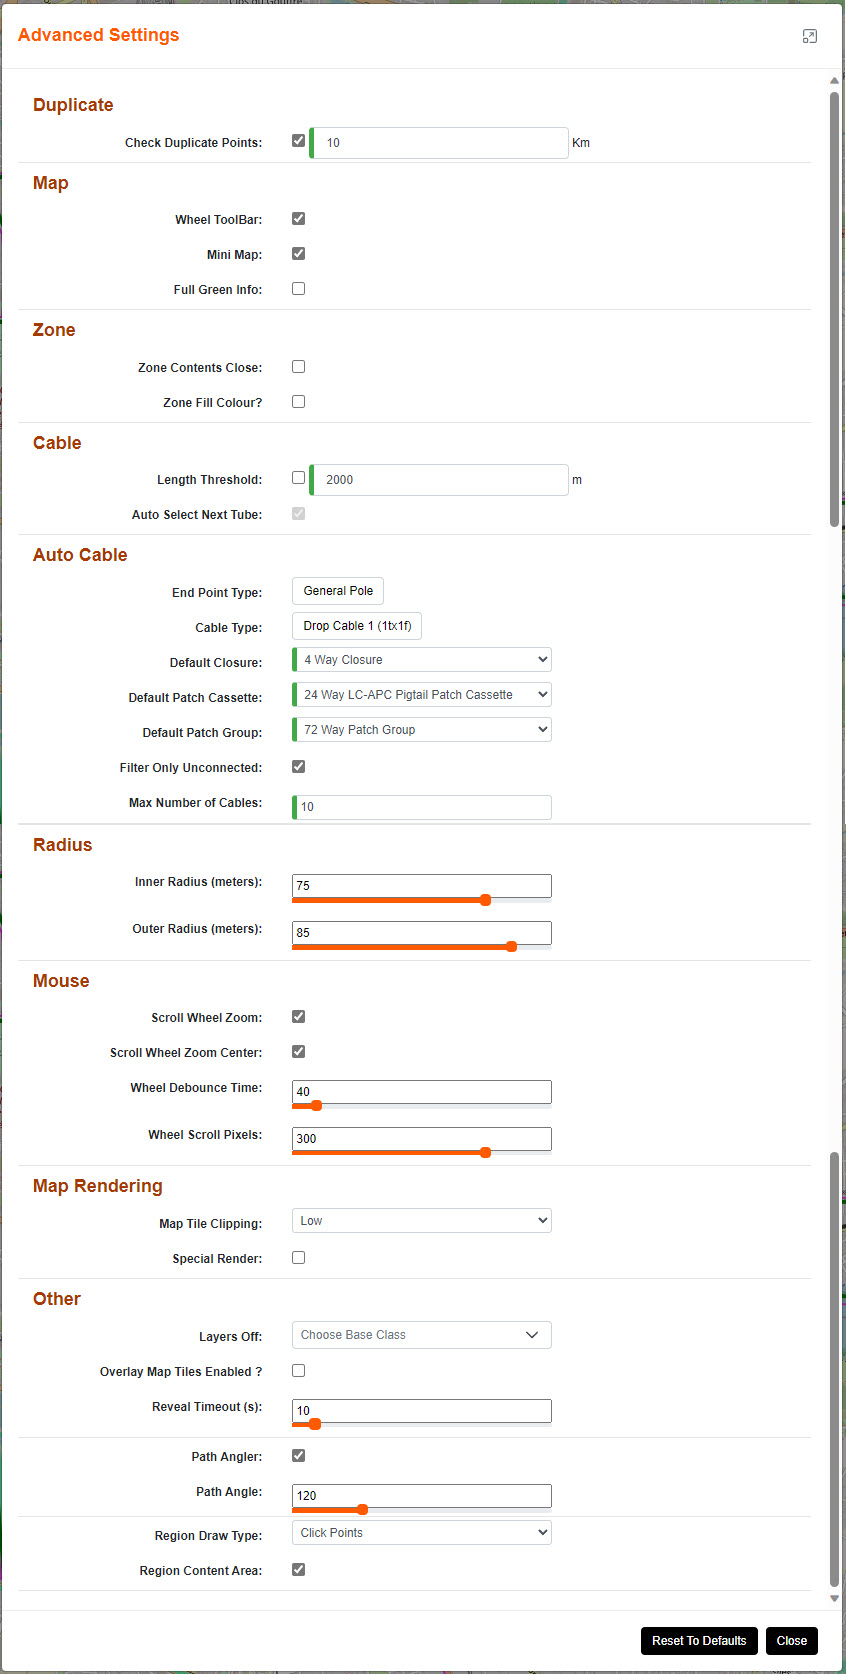
Wheel Toolbar:
When ticked; the Wheel Toolbar functionality is enabled and can be used.
Mini Map:
When ticked; the mini map window is enabled.
Scroll and move around to see where on the map you are located 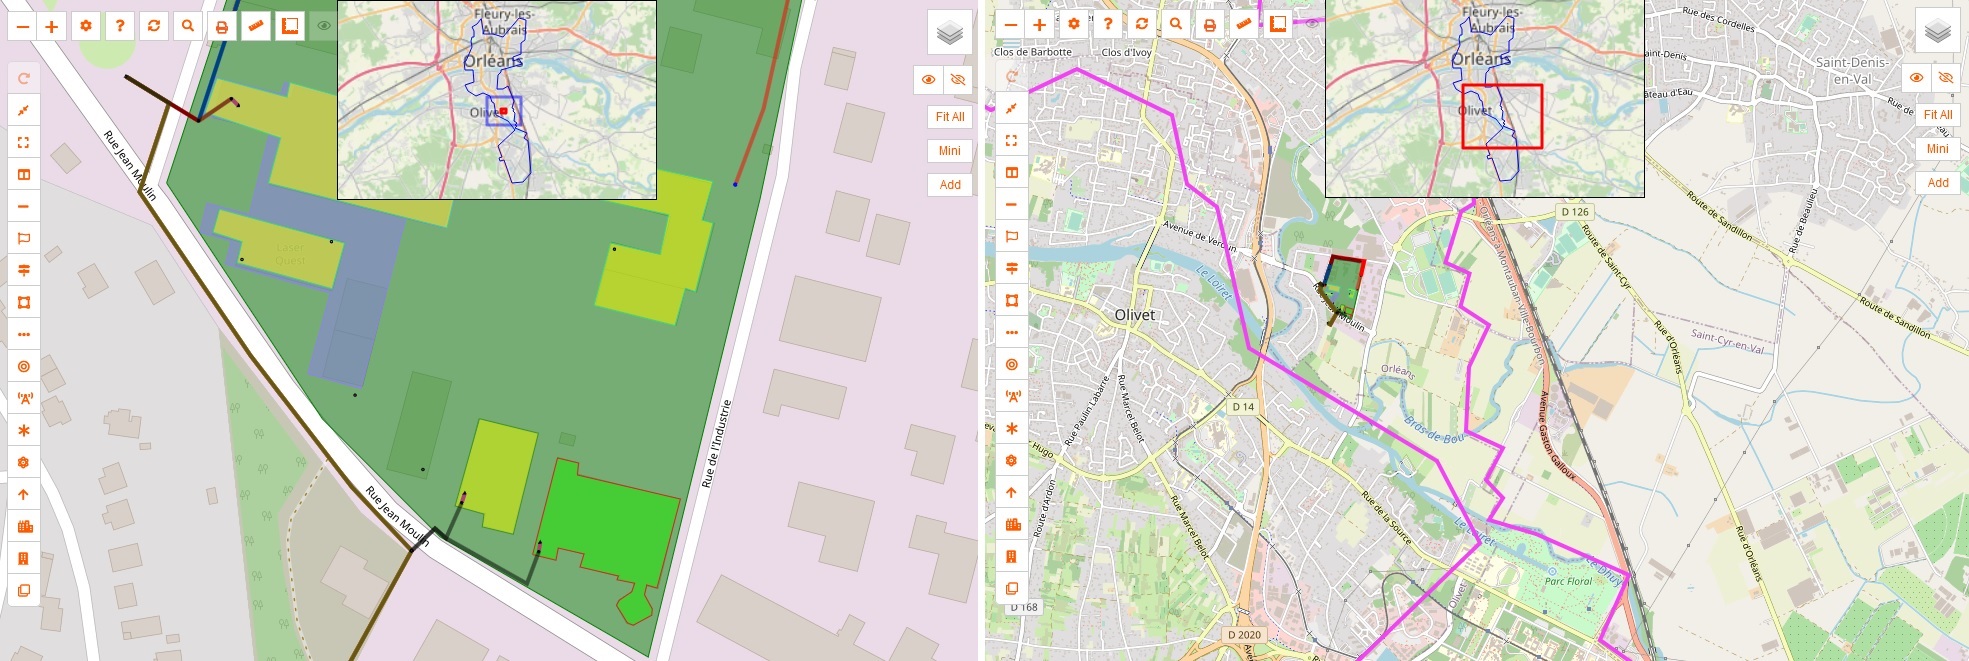
Full Green Info:
When ticked, shows LatLng, Zoom, and Hover Item Name. If not then only shows Hover Item Name.
Zone Contents Close:
When ticked; zone open and close is enabled.
This allows big data within a zone to be hidden until the zone is selected to be opened.
Zone Fill Colour ?
When ticked; this applies all the items within a zone to have the same fill colour as the zone.
Length Threshold:
When ticked; the permitted distance threshold between enclosures for new cables will be checked.
The default length is 2000m, the minimum is 0m and the maximum is 4000m.
Auto Select Next Tube:
Map cabling creation allows for last tube selected to be applied along its duct path
Inner and Outer Radius (meters):
Set map radius indicator to a set distance to visually see what is within that distance from the point selected.
Scroll Wheel Zoom:
When ticked; enables map zoom with mouse scroll wheel.
Scroll Wheel Zoom Centre:
When ticked; enables map zoom with mouse scroll wheel to zoom around map centre rather than mouse position.
Wheel Debounce Time:
Time in milliseconds to limit the rate at which a mouse wheel can fire.
Wheel Scroll Pixels:
Number of wheel scroll pixels per change of zoom level. Smaller values will make wheel-zooming faster (and visa versa).
Overlay Map Tiles enabled?
When ticked; the user views the normal map tiles as transparent over the top of secondary map tiles.
This assists being able to check alignments of map features.
Reveal Timeout (s):
Set map point reveal timeout
Trench Angler:
When ticked: the angle code will flag trenches that are laid with an angle that is too great for Civils.
Trench Angle:
Set the degree that the angle of the trench can go to before flagged as an issue.
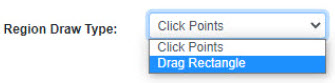
Region Draw Type:
Choose between drawing a region between Click Points and Drag Rectangle
Region Content Area:
When ticked; E region map loads and is used to check that the region covers the content.
Map Tile Clipping:
Set clipping buffer so point items don't render badly. Low value is less clipping but slower.
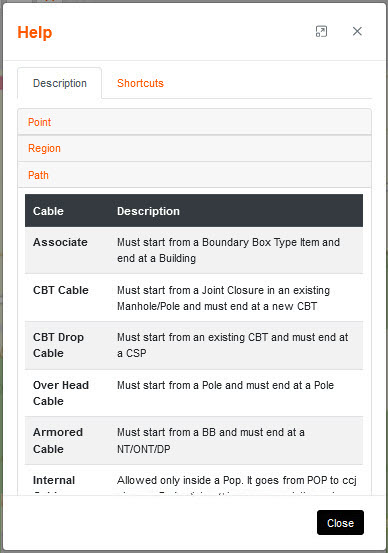
Help:

The Help pop-up has two tabs; Description of items (including their rules) and keyboard Shortcuts.
Refresh:

The refresh allows the map to be dynamically updated with any items created by other users.
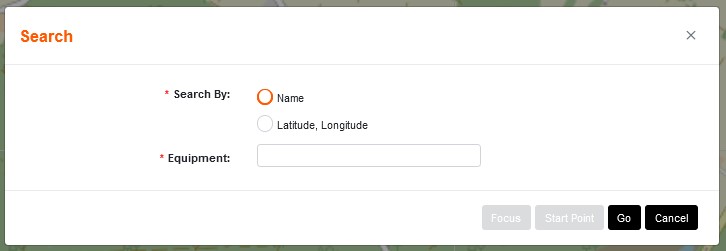
Search:

Enter the latitude and longitude of the spot you want to navigate to.
Enter the name of the item that is being searched for.
Print:

Landscape and Portrait will print the view on the screen.
Auto will print the area comprising of all the items.
Custom will present you with a drag box function to choose the area to print.
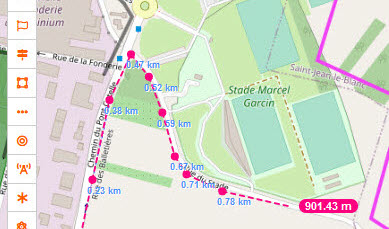
Enable Ruler:

Click on the map to place a point to start measuring from.
Each point will show you the distance. Double click for a second ruler. Escape to disable.
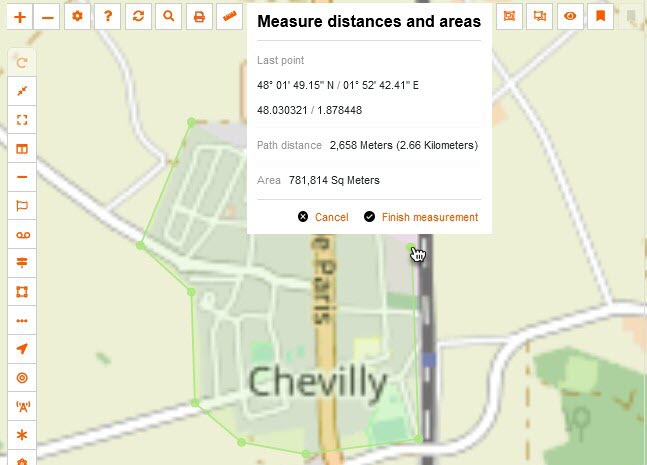
Measure distance and Area:

Click on the map to place a point to start calculation from.
Each point will add to the calculation. Finish and the area will be there until you delete it.
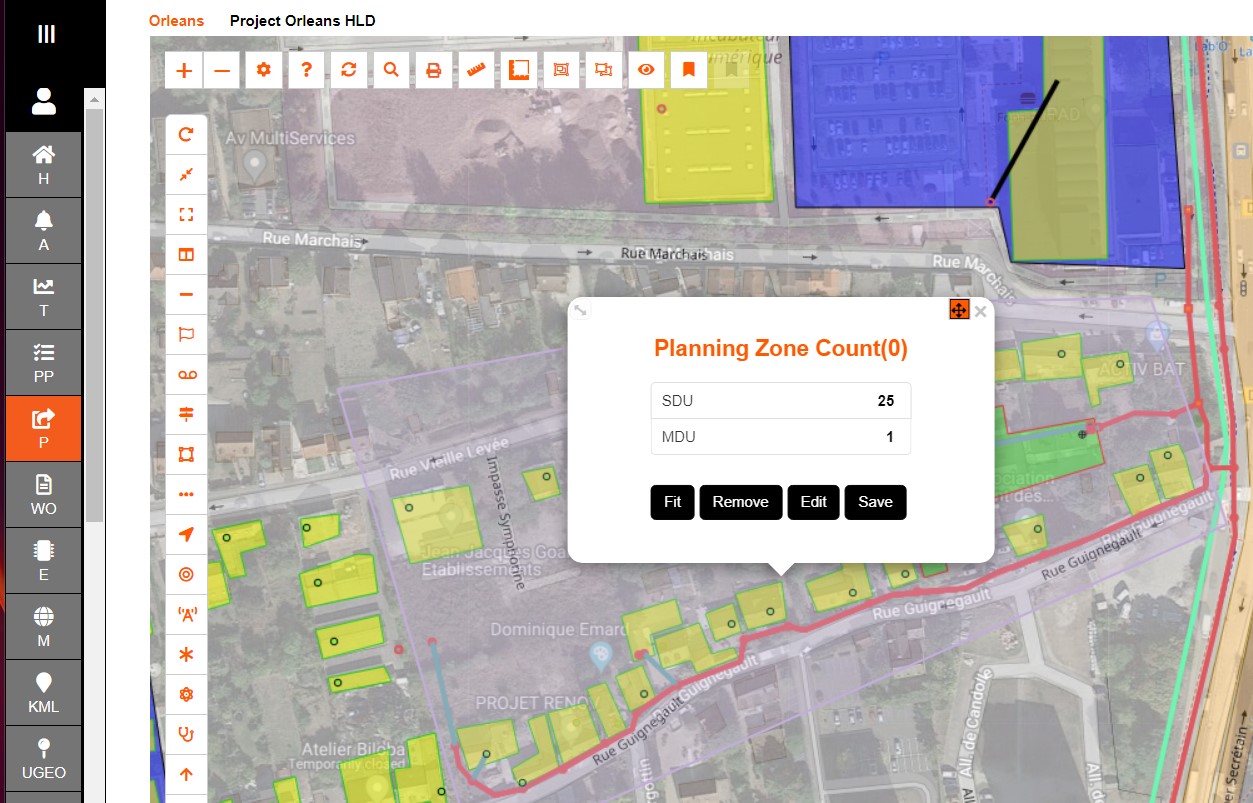
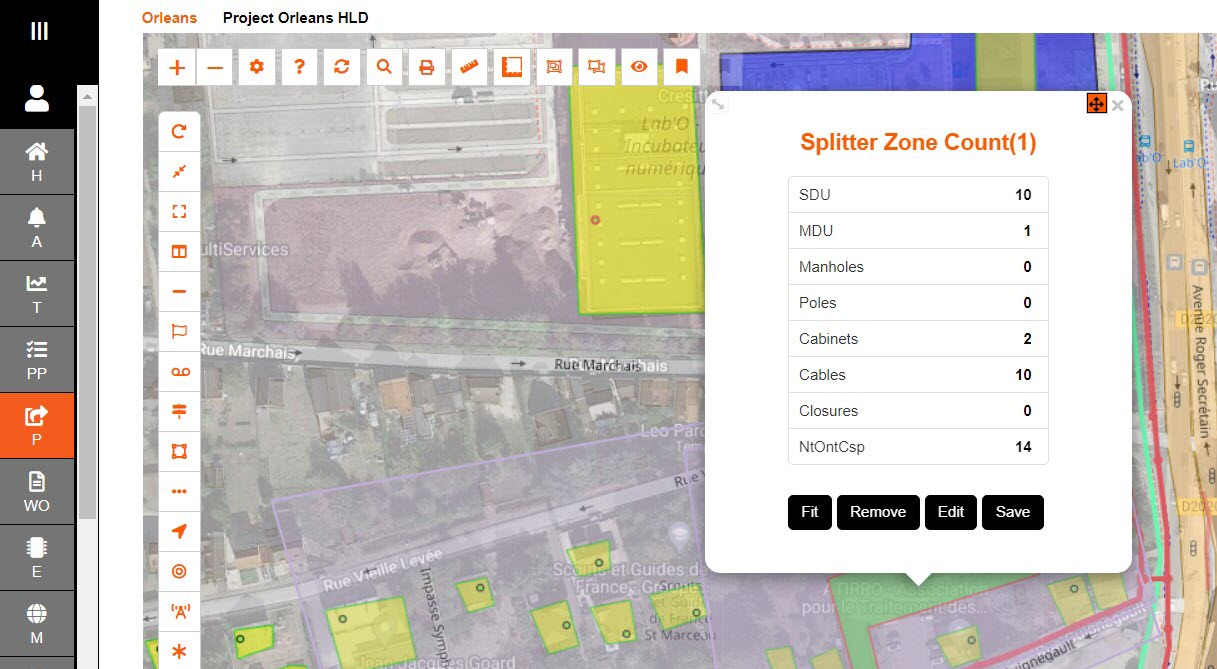
Capture Planning Zone & Capture Splitter Zone:


This allows a polygon to be drawn including items to assist in planning.
They can be edited, saved to an actual zone or removed.
The Planning Capture indicates the number of MDU and SDU that you captured within the polygon.
The Splitter Capture indicates the number of MDU and SDU, as well as items within the polygon.
Last View:

Last view assists the user on finding where they were last working before the user left the map screen
Save & Load Current Global Bookmark View:


In order to return to the view you currently have, Save and Load the bookmark.
2. Layer Views
Layer Items Control:
Every time an item is added to the Map - it gets added to the Layer Control.
When the map gets busy there is an option to turn off viewing certain items.
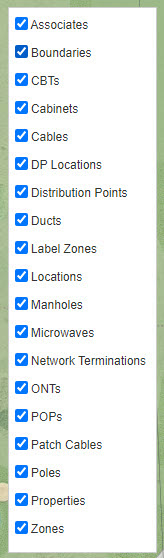
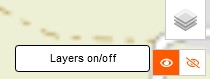
Layers On and Off:
This can be used when needing to see the map without the added items.
View:
The 'View' has a feature to filter out the new and existing inc. new.
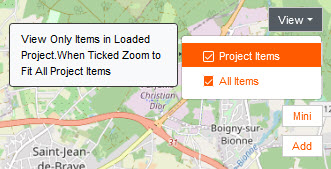
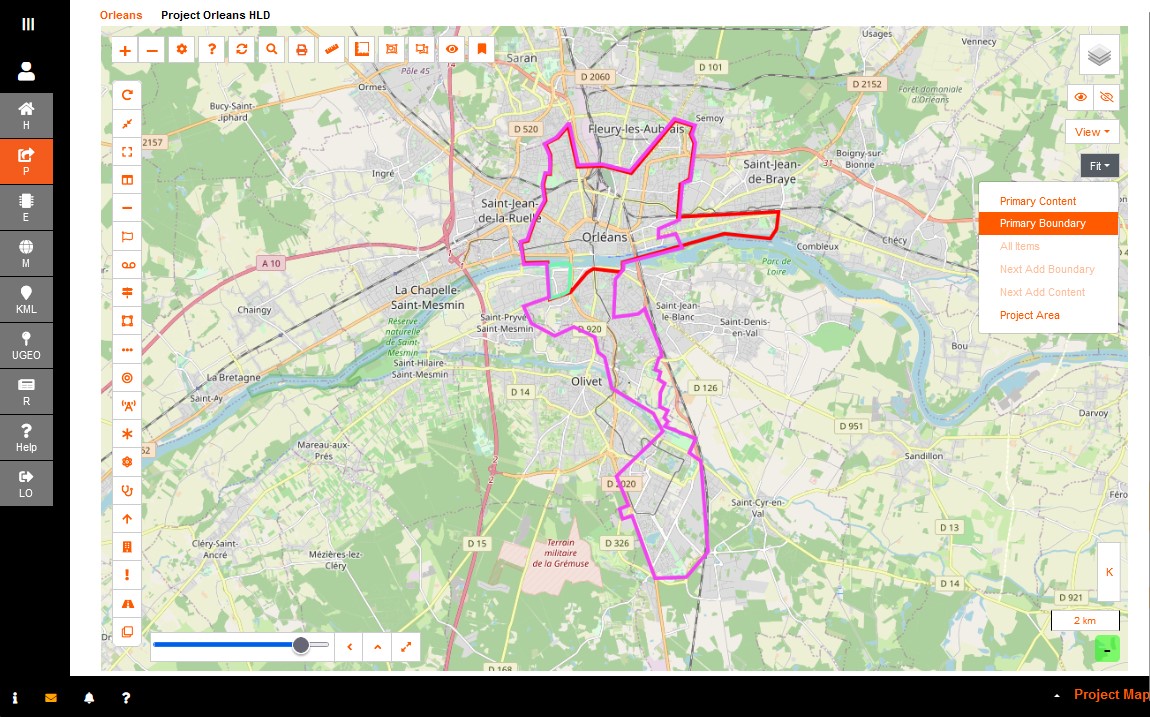
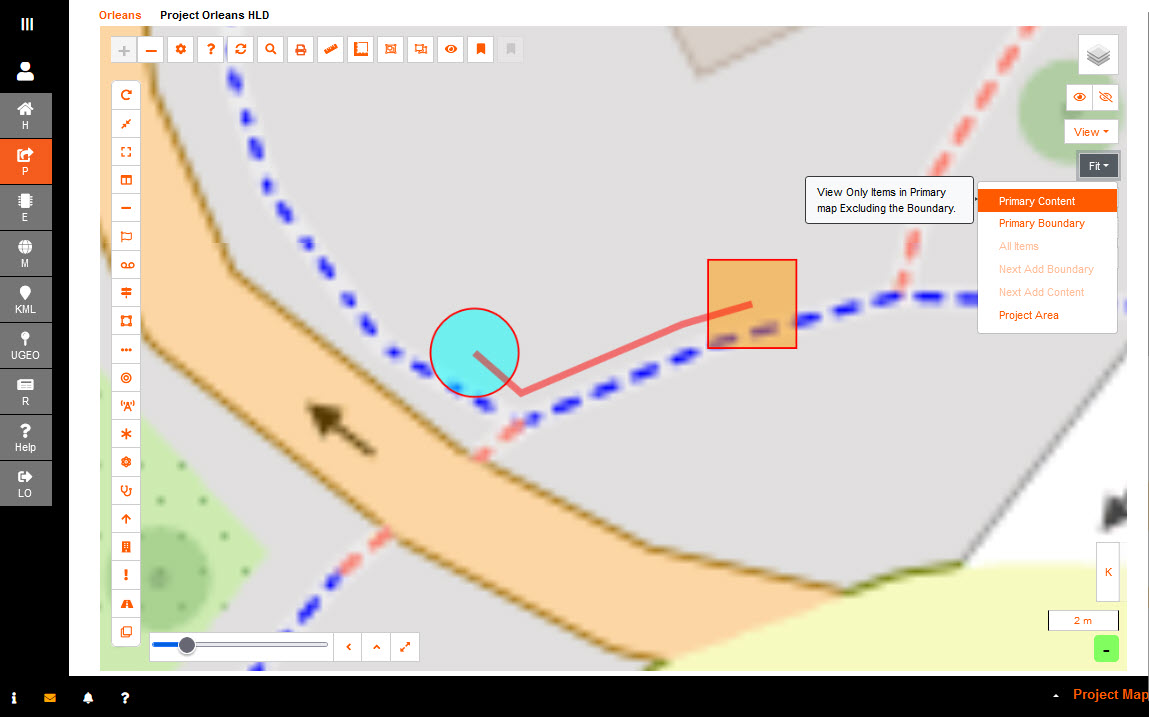
Fit:
The 'Fit' drop down toggles between the POP Location view, Project Area, Add Locations, involving the items selected in View.
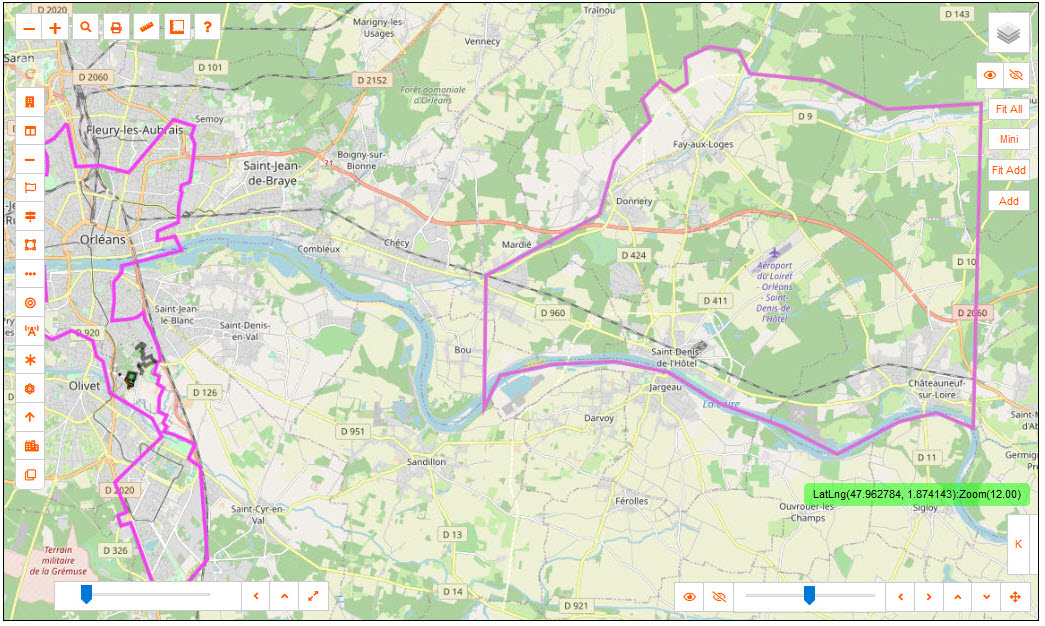
3. Mini Map
Enabling Mini Map - you have the ability to see where you are in your POP Location.
It is a dynamic view, with the ability to move the red square to where you require for each of navigation.
4. Add Alien locations
The ability to see the other locations, within your Sub Locations, aids in test trunk/backbone network.
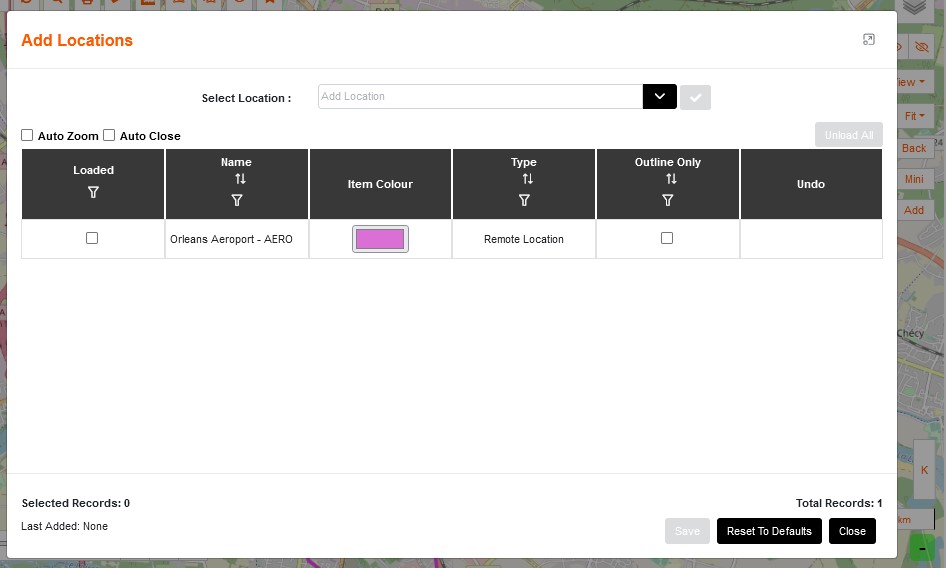
Selecting an alien location to Add to the map will allow it to be viewed alongside the main location.
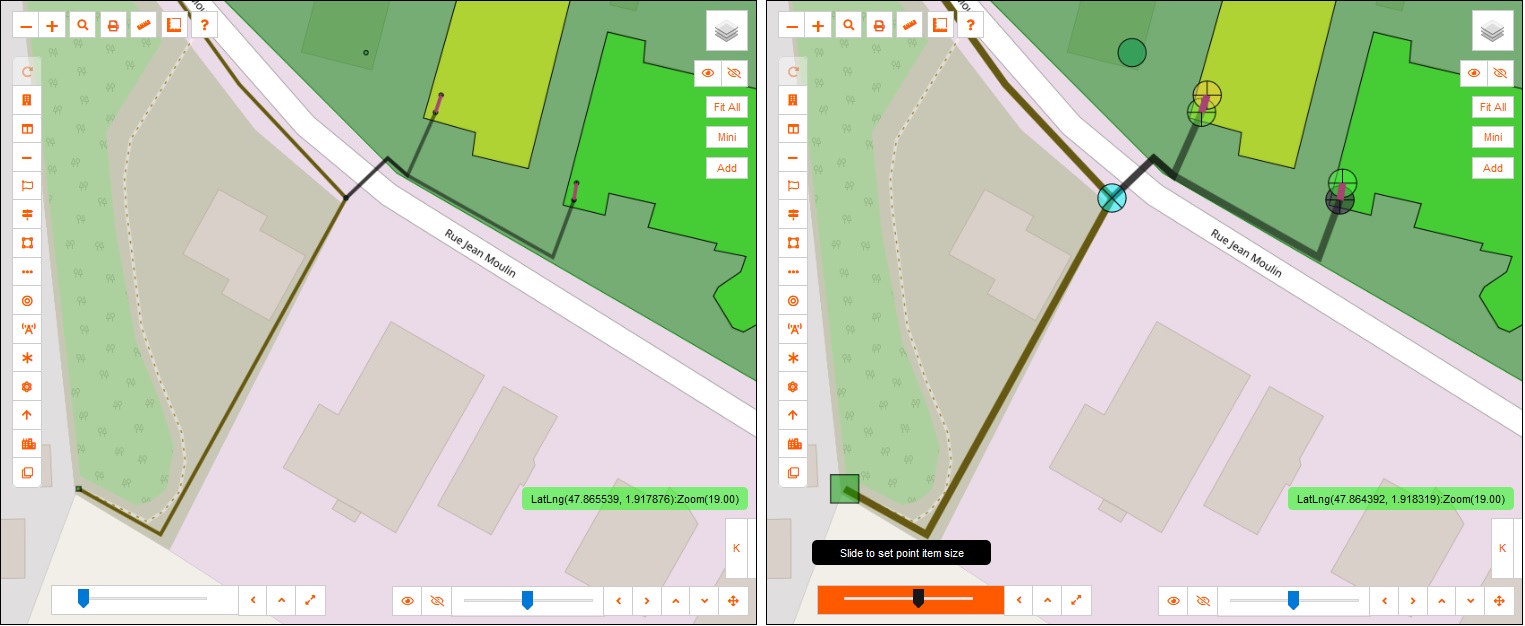
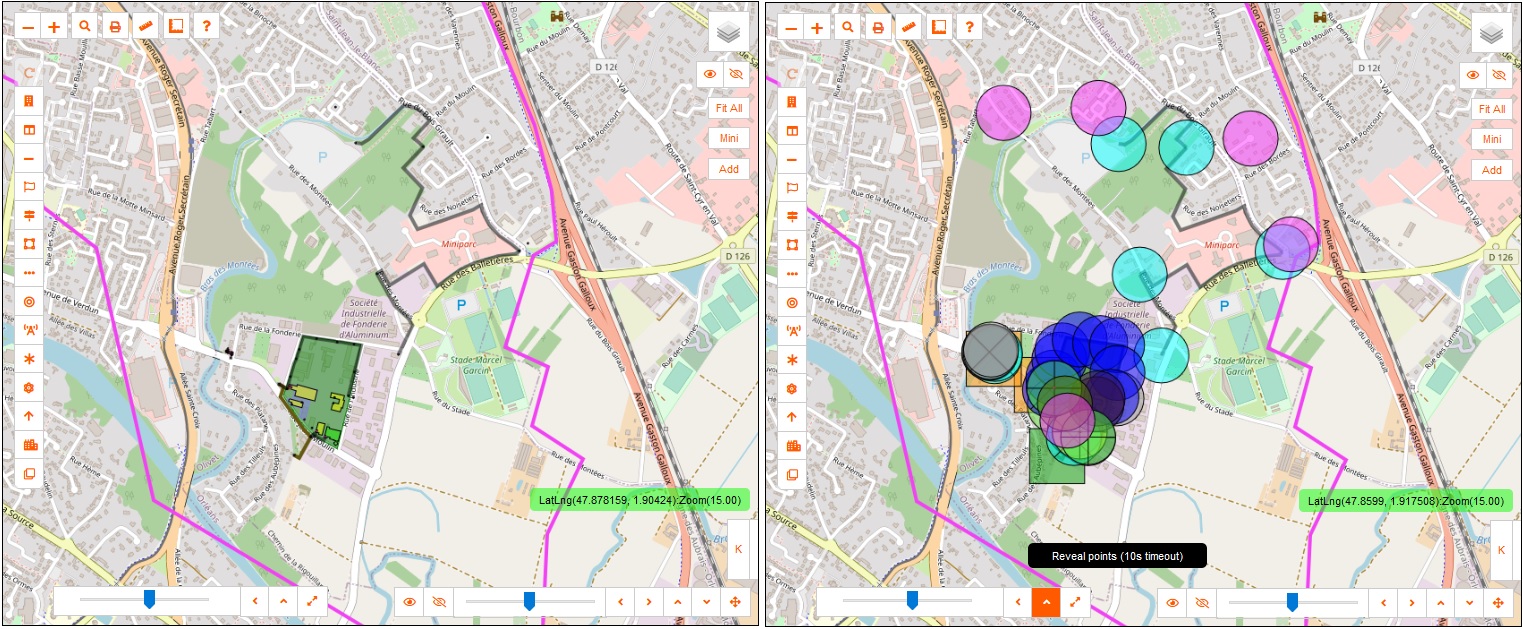
5. Point item control
While items should be realistic sizes, for ease of navigation - the size can be modified with the Slider Bar.
The options are: Slide to Set, Reset default size, Reveal Points and Large Points Mode.
While zoomed out of the map - a quick Reveal Points pops up the items really large to find items.
This also helps with laying auto cables.
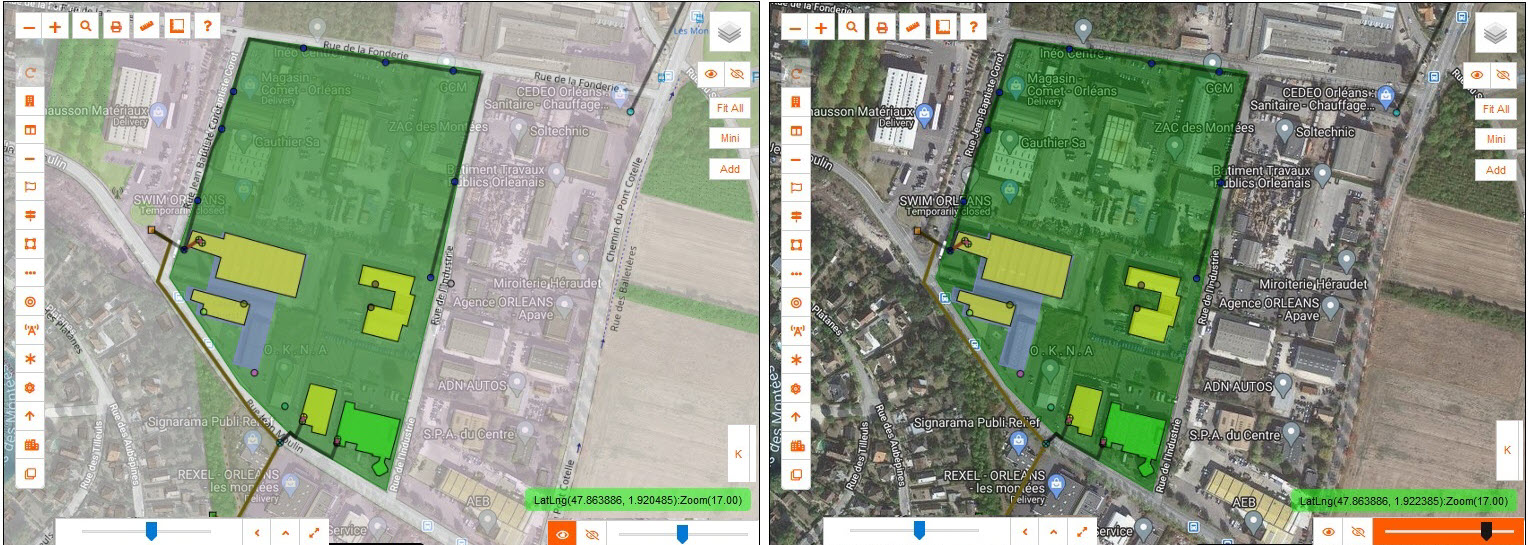
6. Satellite View Overlay Control
This overlay assists in the building of the network.
The options are: Show Overlay, Hide Overlay and Set Opacity
7. Repeat last selection
After selecting an item to be created, the toolbar will remember that action and open the sidebar to assist in the next creation.
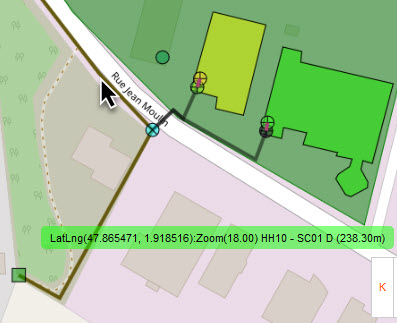
8. Pointer Information
The pointer information follows the mouse, and reports live LatLng (Latitude and Longitute) information, as well as Zoom level.
Hovering over an item will give details of it
i.e.: hover over duct and the name will appear, along with the length of the duct.
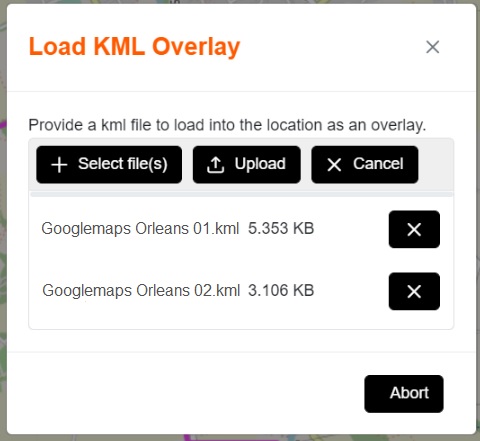
9. KML Load
The map has the ability to load in kml as an overlay.
Expand the 'K' bar.
The options are: Clear Load, Fit Loaded Items, Toggle Layer On/Off and Load.
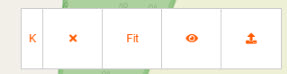
Load allows multiple files at one time.