In order to create Ducts you need to have already created Cabinets, Manholes and DP/NTs as these components connects these locations together and requires one of these as a start and end point.
Remember that you should always build from the POP towards the DP in order to ensure you have a fully connected Network.
In the Tree, select the relevant POP Location.
In the maps shortcut menu, select the Ducts icon.
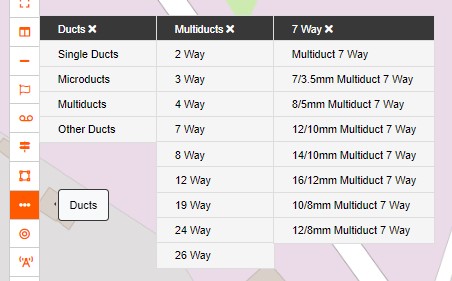
Select the type of Duct you wish to create.
Use the Pointer Information green bar, on the bottom right-hand corner of the screen, for reference on distances.
First select a Start Item (POP/Cabinet/Manhole/Pole).
The text on the footer will prompt you with the next step - select an End Item (Cabinet/Manhole/Pole/DP/NT/ONT).
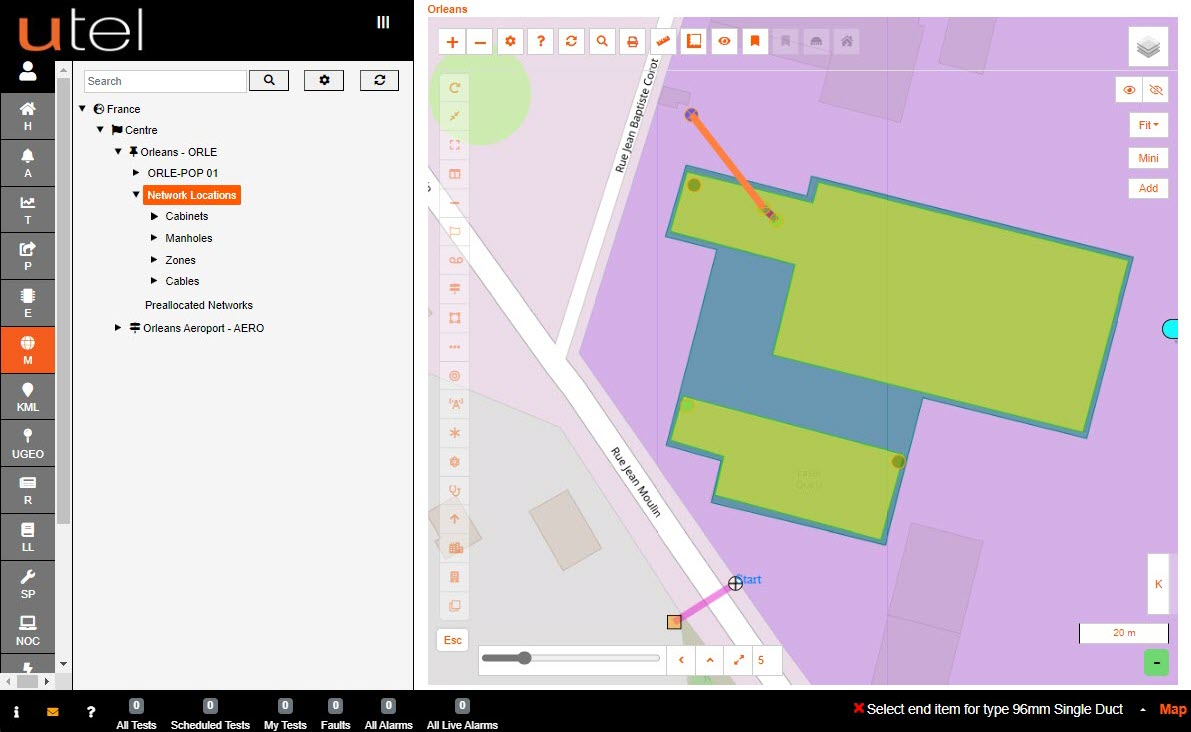
When you have selected your end point, your path route place will become active.
As accurately as possible, click on the map to create the required path - using as many points as necessary.
You will notice that it auto-calculates the distance between the start and end points.
The duct path can be edited at anytime after being created if the exact path isn't known.
Include any intermediate items, if there are any, and the duct naming will automatically be modified to include the points “Start point – End point”.
Click the Last Item to finish your line.
The duct will appear on the screen as a line
Ducts will not appear in the Tree (except if creating a project task in P).
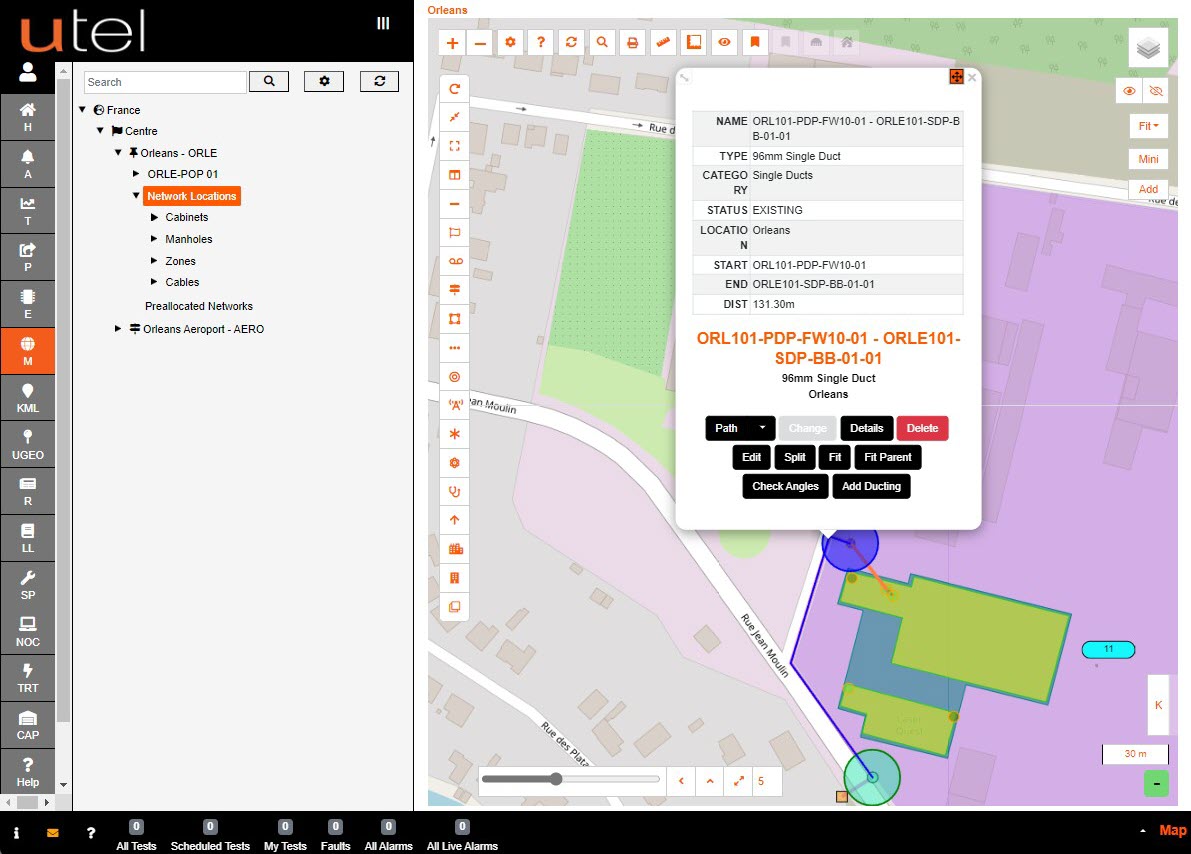
Navigating to Duct Details select the duct item on the map.
This will display the Duct name, along with the options to Details, Delete, Edit, Split, Fit, Check Angles, and Add Ducting.
Hover over the name will give a few quick view details.
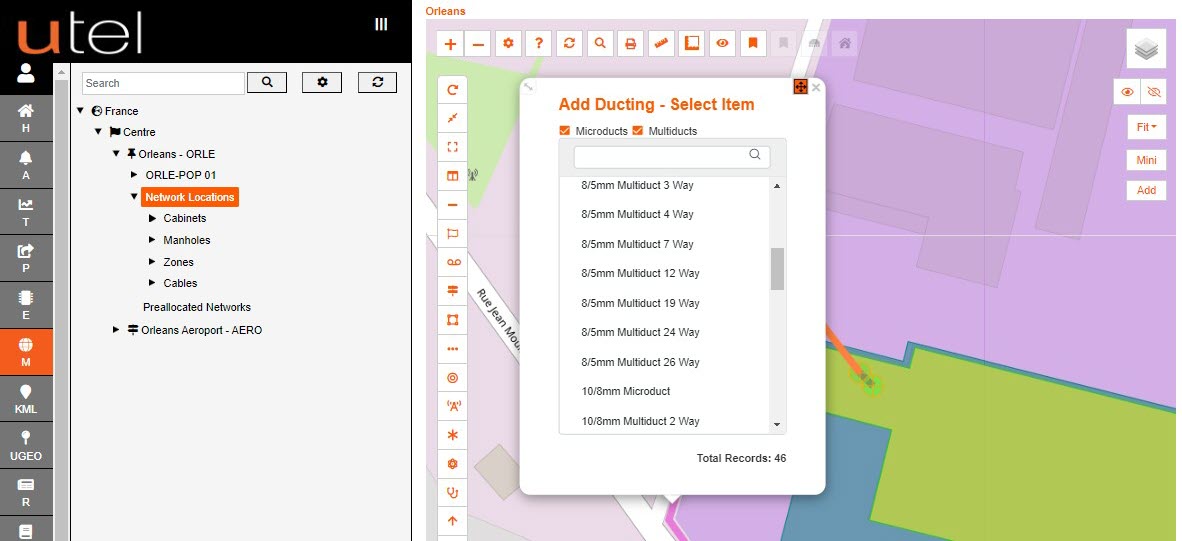
There is an option to create a Multiduct or Microduct within a Singleduct with the Add Ducting functionality.
Scroll and select the desired inner duct to be added.
Click the duct path and both items will be displayed to be selected.

Cables can now be created to follow the duct path.
The Cables can be selected from the toolbar or from it's starting point 'Create Cable' button.
The functionality will be the same as ducting, except the user will get the opportunity to select which tube if within a Multiduct.