In the Tree, select the relevant POP Location.
In the maps shortcut menu, select the Distribution Points icon.
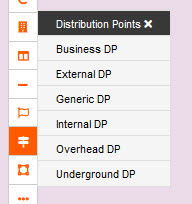
Select the type of DP you wish to create (Business, External, Generic, Internal, Overhead and Underground)
A sidebar will appear on the right-hand side.
Input a display name for the DP according to your Naming Convention and any relevant Notes you wish to add.
There is an option to 'Add and continue' and 'Auto Increment'.

Clicking Ok re-engages the map screen with a target marker.
Move around the map and use the zoom function to place this as accurately as possible on your map.
The Latitude and Longitude coordinates of the marker are visible in the top right-hand corner of the maps screen for reference.
Click to place the marker.
The DP name will now appear in the Tree.

Right click on the DP in the tree then gives you the option to view the Details.
Another way to DP Details is to click the item on the map.
Hover over the name will give a few quick view details.