|
Running tests for all routes can be accessed in the NOC. |

This tab is only accessible by the NOC to test routes to verify faults and then report the findings.
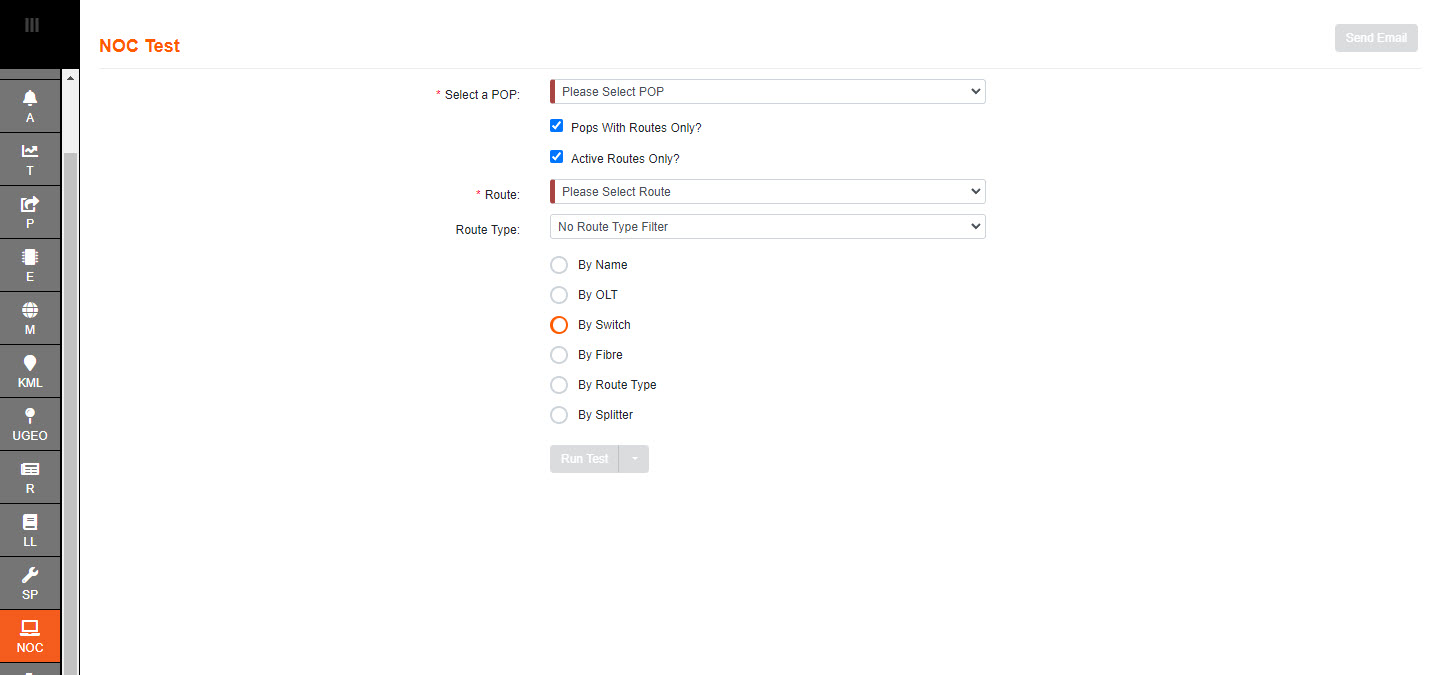
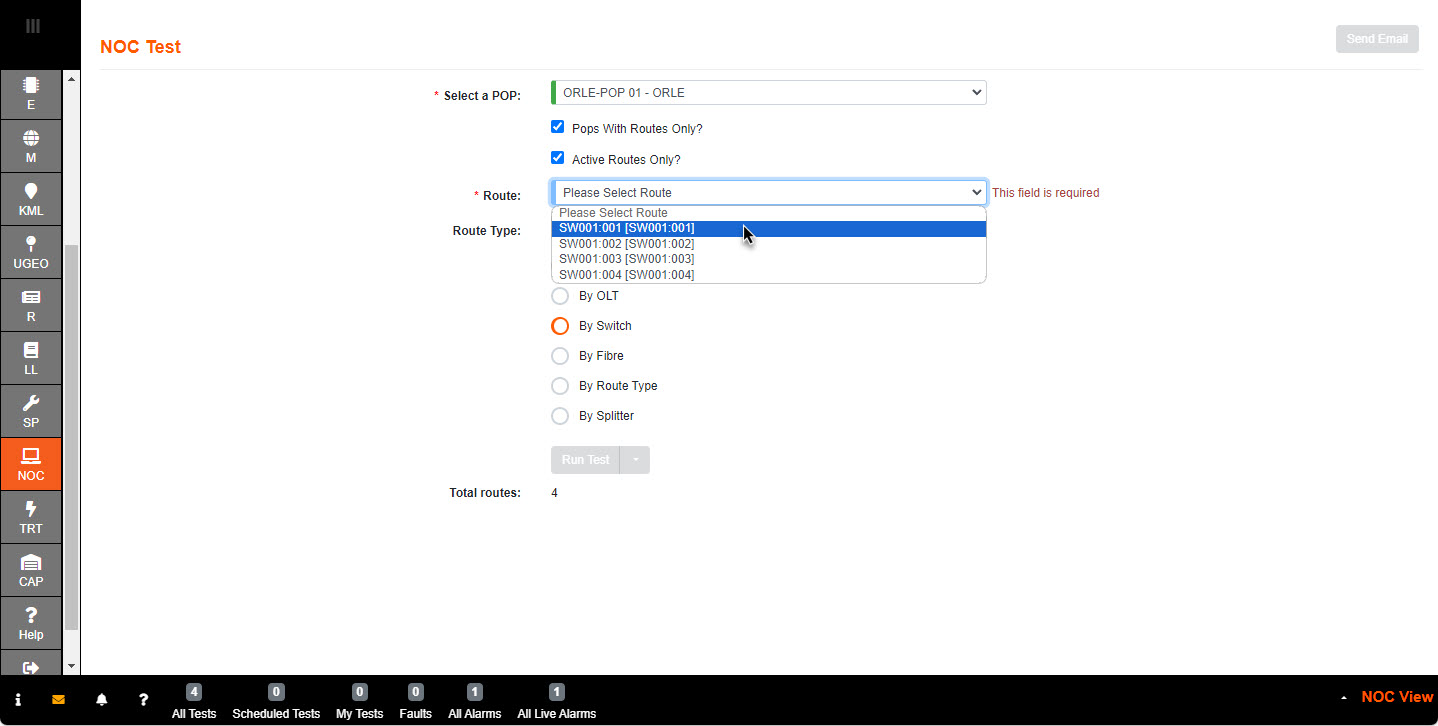
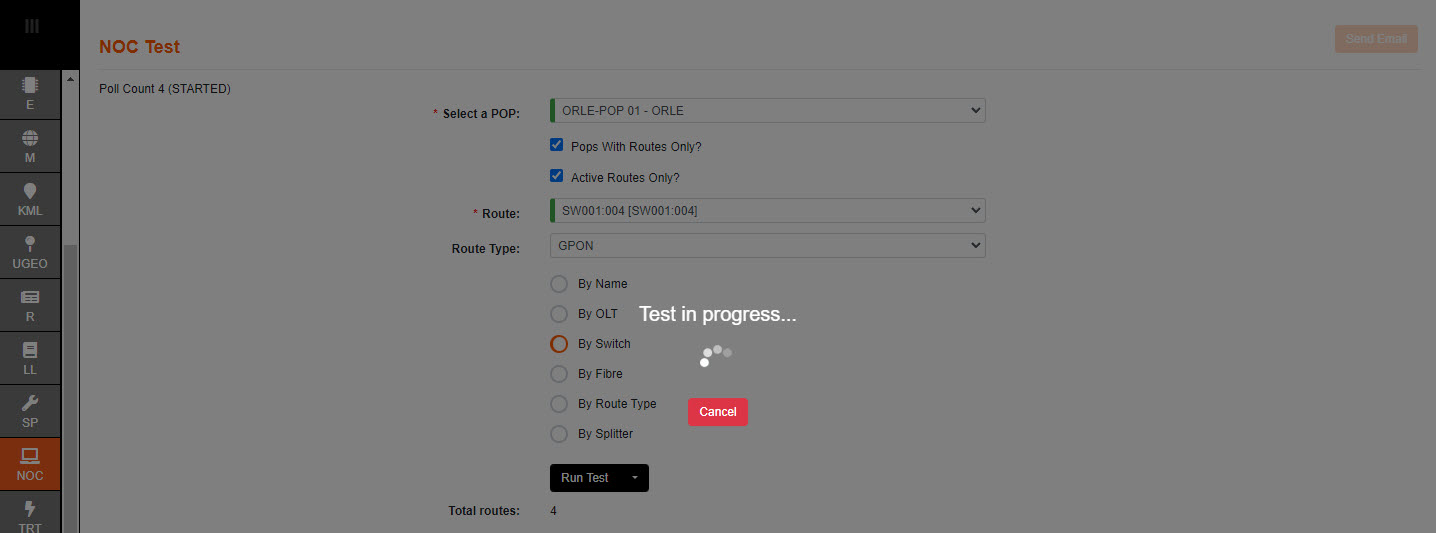
1.Select a POP drop down box lists all the Point of Presence locations in your network. Navigate to the required location for your Route.
2.Select a Route to test using the desired filter.
The Filter allows you to find the route by either Name, OLT, Switch or Fiber.
The default is By Switch.
Good practice is for the user to select an active route.
This means that it includes a Planning Diagram, and Assigned Events.
3. Filter out the Route Type to have condensed list. ie: VIP Customers
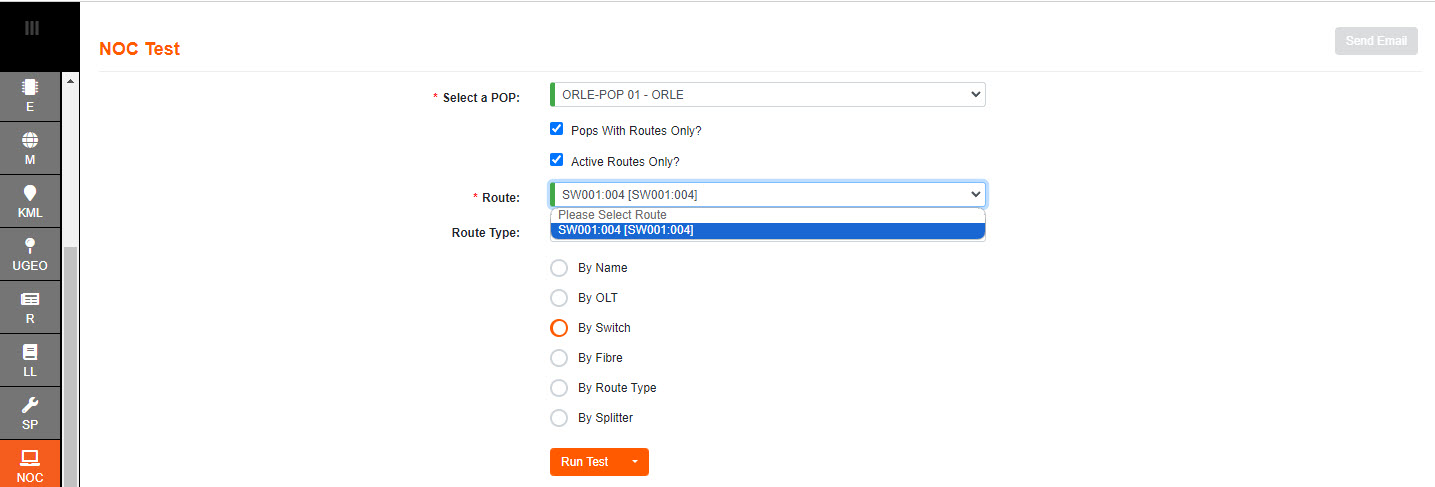
4. When you have selected the Route you need to test then select Run Test.
The drop down allows the user to select which type of test, or the default will be run.
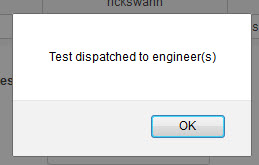
5. Selecting Confirm will bring up the 'Test in progress' indication, and it will stay visible the whole time the test is running.
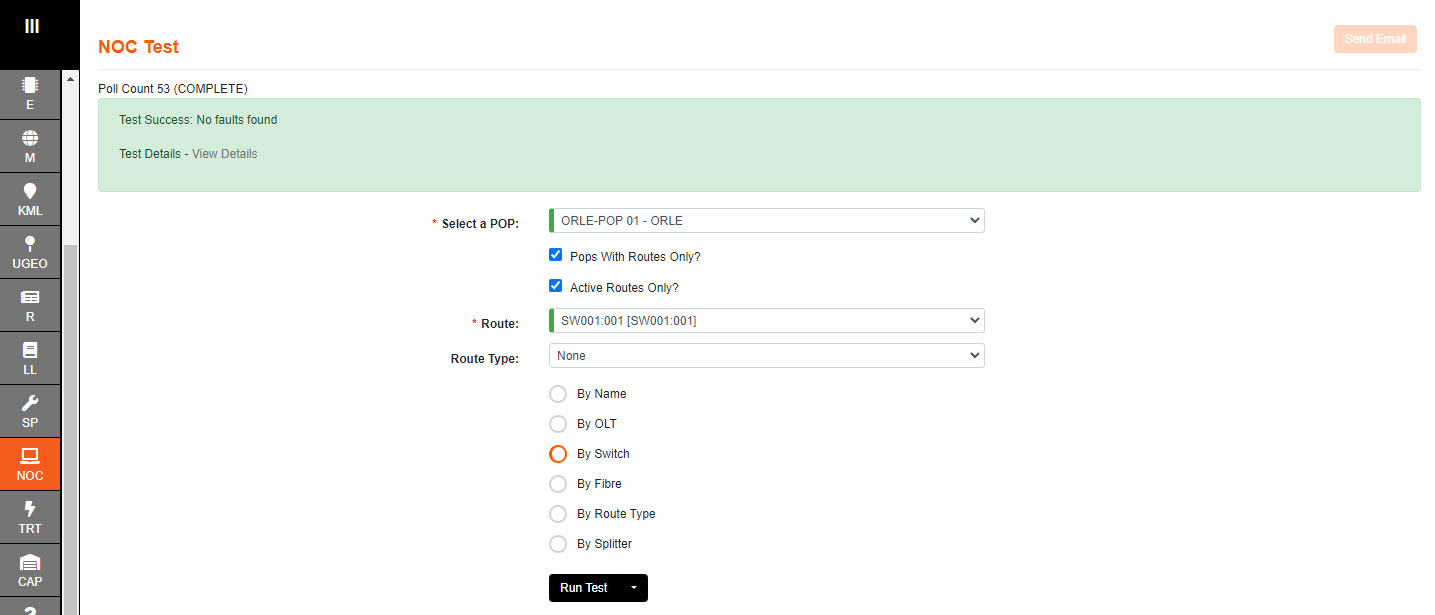
6. You will get the result for the test displayed along the top of the screen, along with a message.
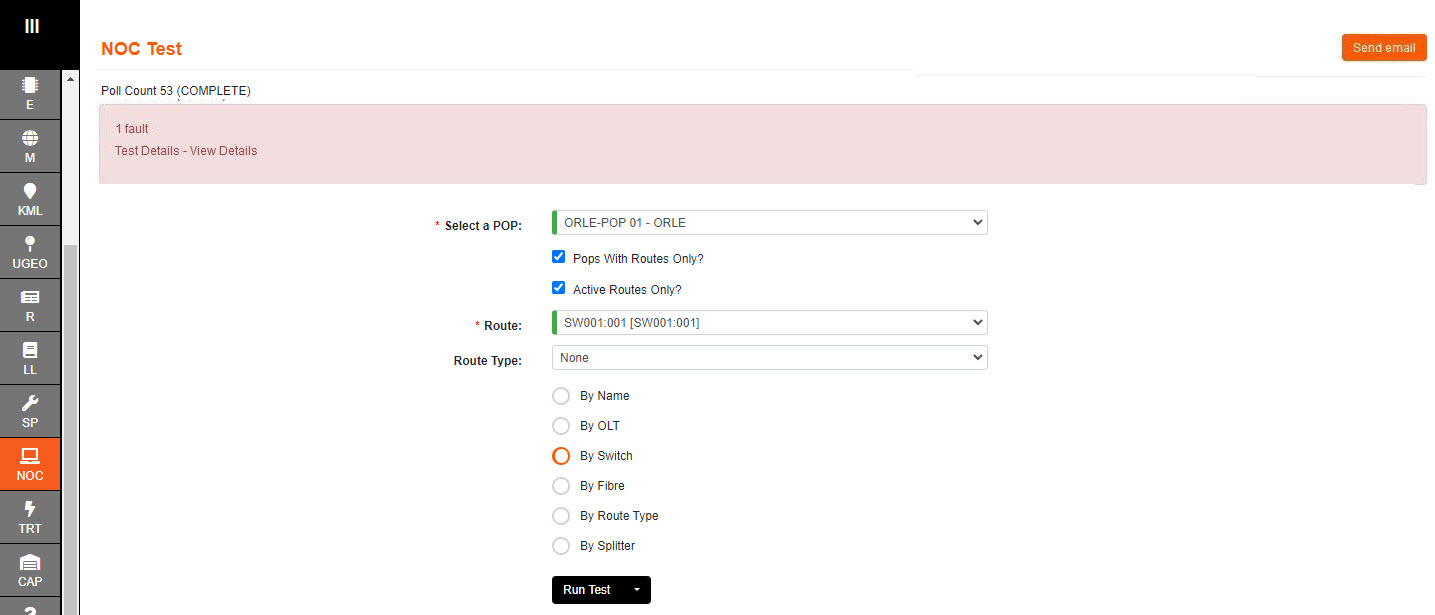
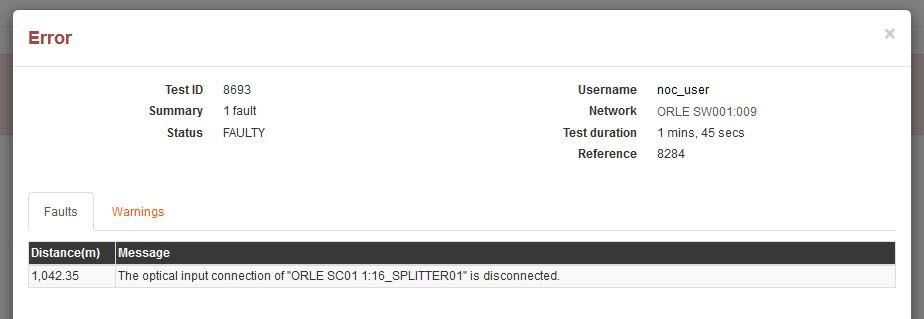
7. On receiving a Fault message the user can click on View Details.
8. If there is a Fault on the line the Send email button will become available.
This can be used to report the issue to another user.
Select one or many contacts and then click Send.