You can select the New User button, on display in the top right-hand corner, after selecting either User, Staff or Contractor in the tree.
A form will be presented to add unique details.
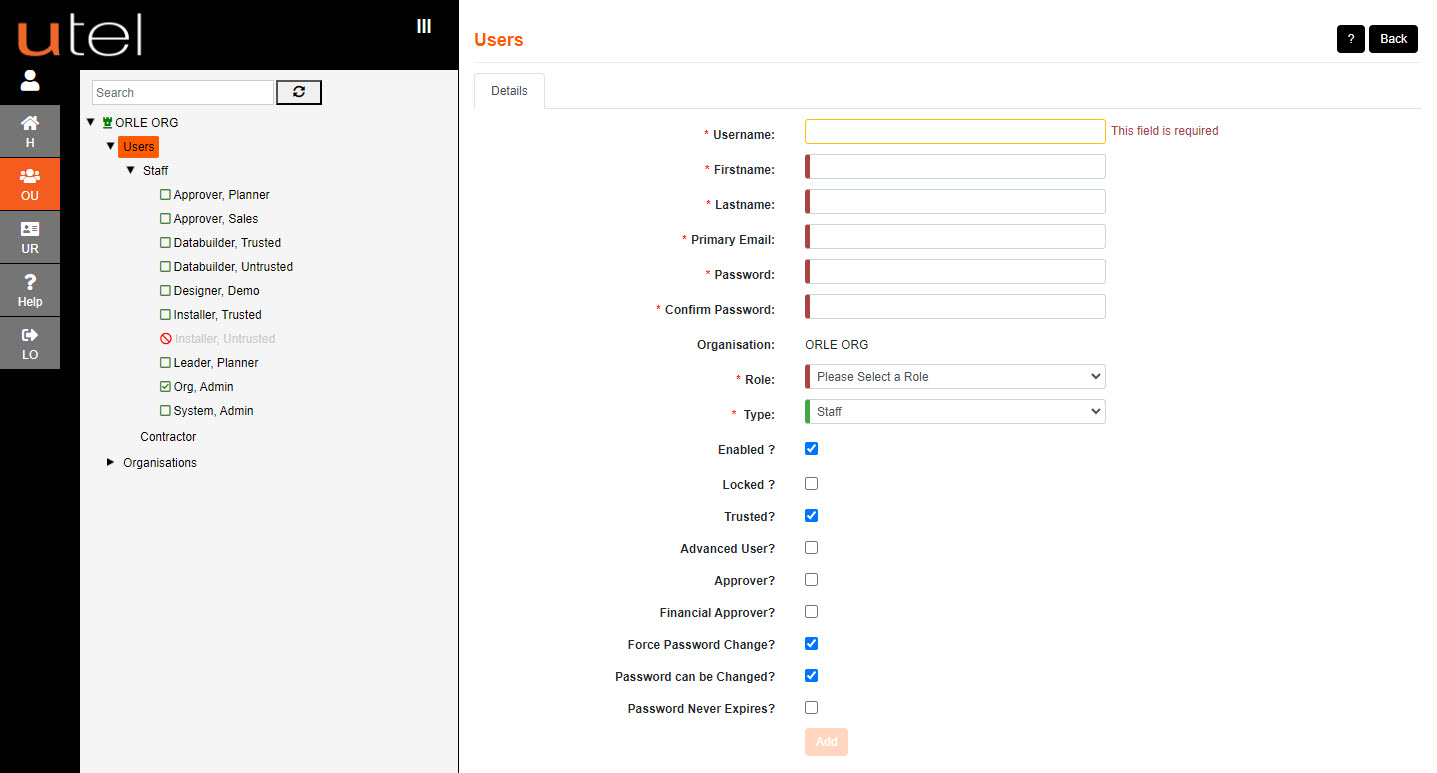
The Username selected will be used to sign into Fastlight2.
Entry boxes that have an orange outline indicates that the info cannot be modified once added.
Add the Users Name and Email address, along with an initially set Password.
Select the Role to be assigned to this User from the drop-down menus provided.
The Type of employee (i.e. Staff or Contractor) can be changed if creating a New User from the User page.
If you would like to disable the User to make them inactive, untick the Enabled box. Otherwise leave it ticked.
If you need to lock the User out of the system, tick the Locked? box.
If you would like to flag the User as untrusted, untick the Trusted? box. Otherwise leave it ticked.
If the user will be an Approver for Projects, tick the Approver? box.
If the user will be a Financial Approver for Prospects, tick the Financial Approver? box.
The User can set their own password once signing in, with the Force password change? ticked.
This is advised. This will also automatically be applied if the Admin changes the password at any time.
If you allow the User to be able to edit their password once set, tick the Password can be changed? box.
To override the System Property setting to expire passwords for this user, tick the Password never expires? box.
In order to save the entry, you must input data into all fields with a red line at the start.
The Add box will only turn orange and allow you to save entry when all fields are populated and have turned green.
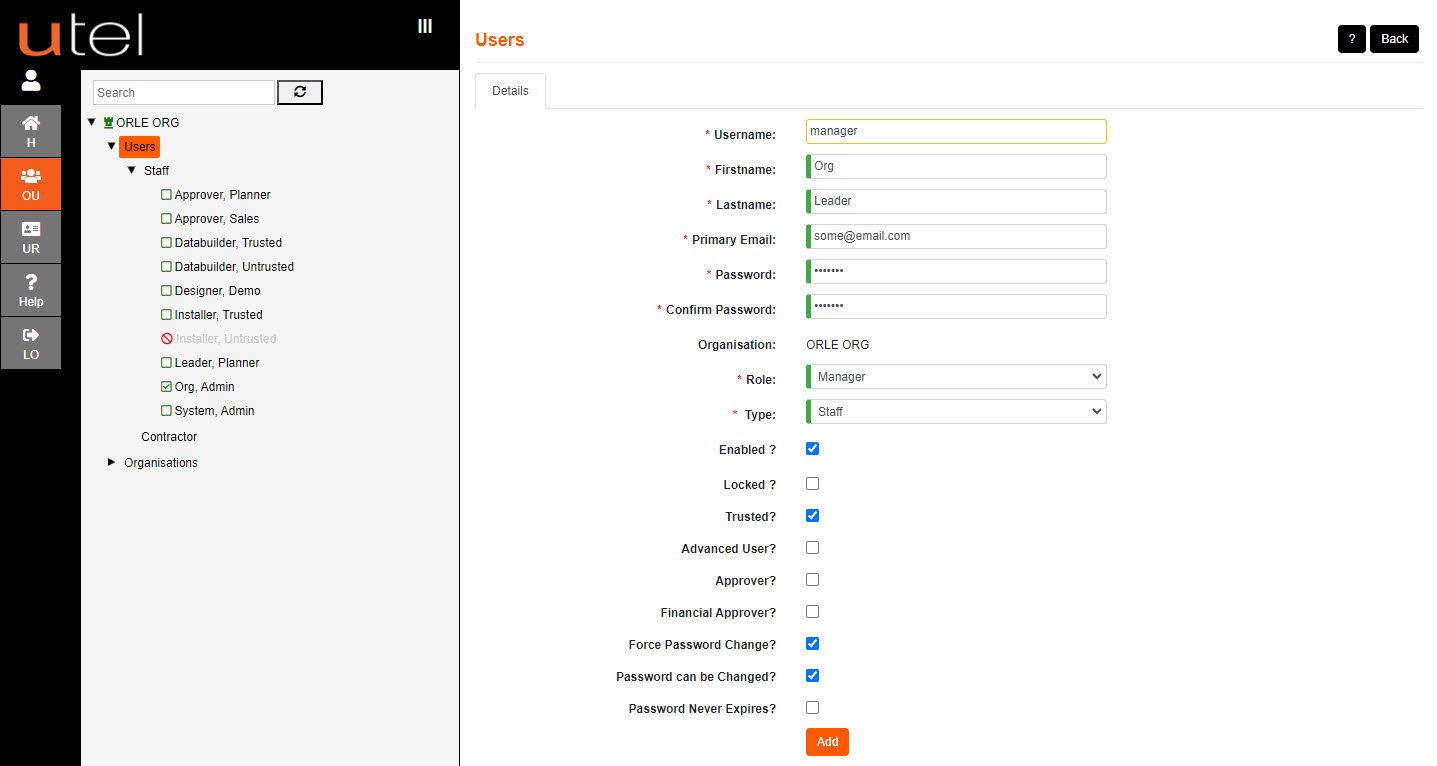
The new User should now appear in the expanded Tree.