1.In the Tree, select the POP Site that you wish to add the Rack information to.
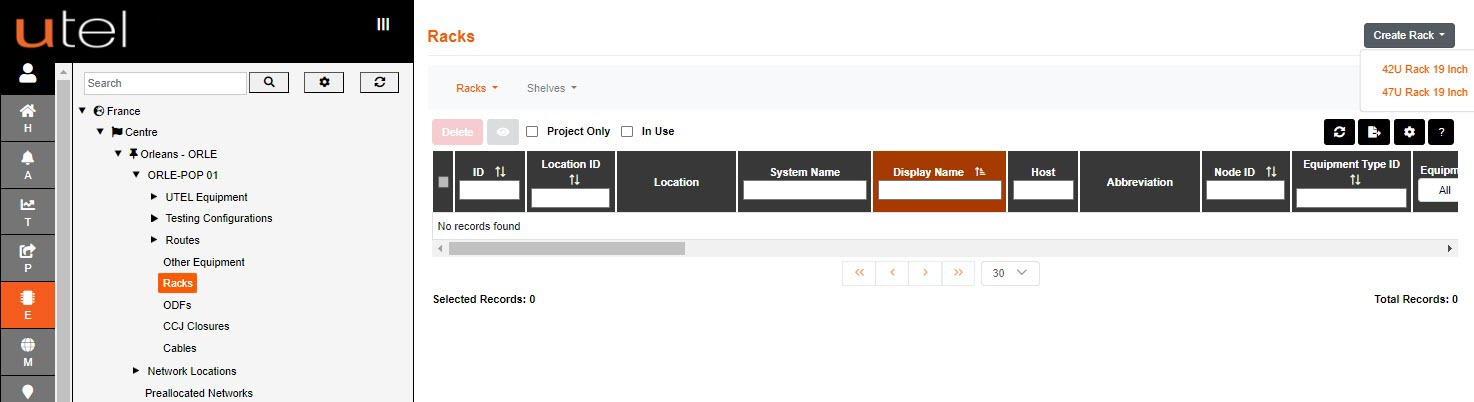
2.Click the Create Rack button.
3.A drop-down menu will appear with all the Rack options available in your Network.
Select the one you require. For this example; we will add an 42U Rack 19 Inch.
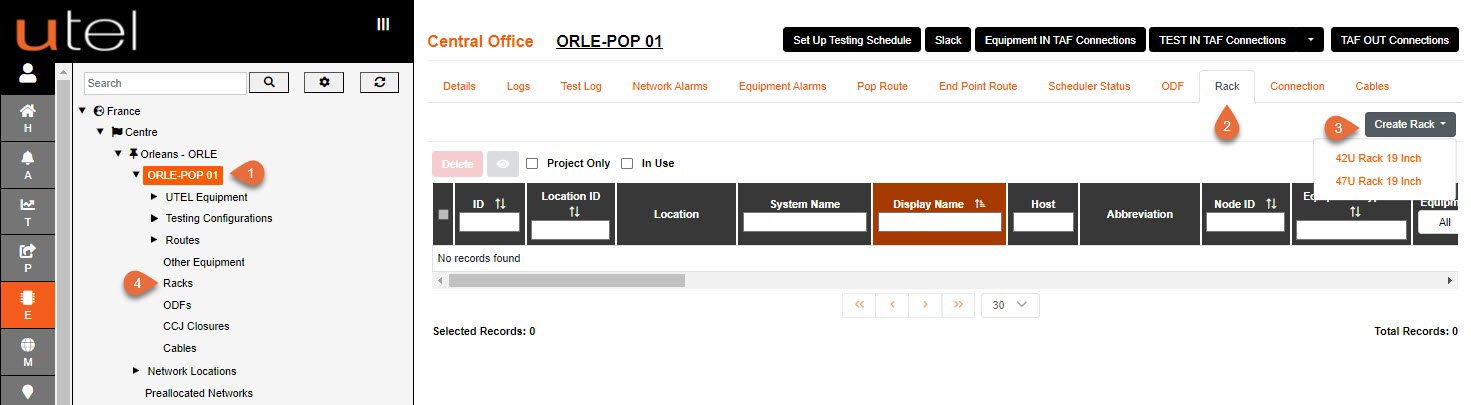
4.Alternately, you can navigate to Rack, in the tree, and add one from the drop down.
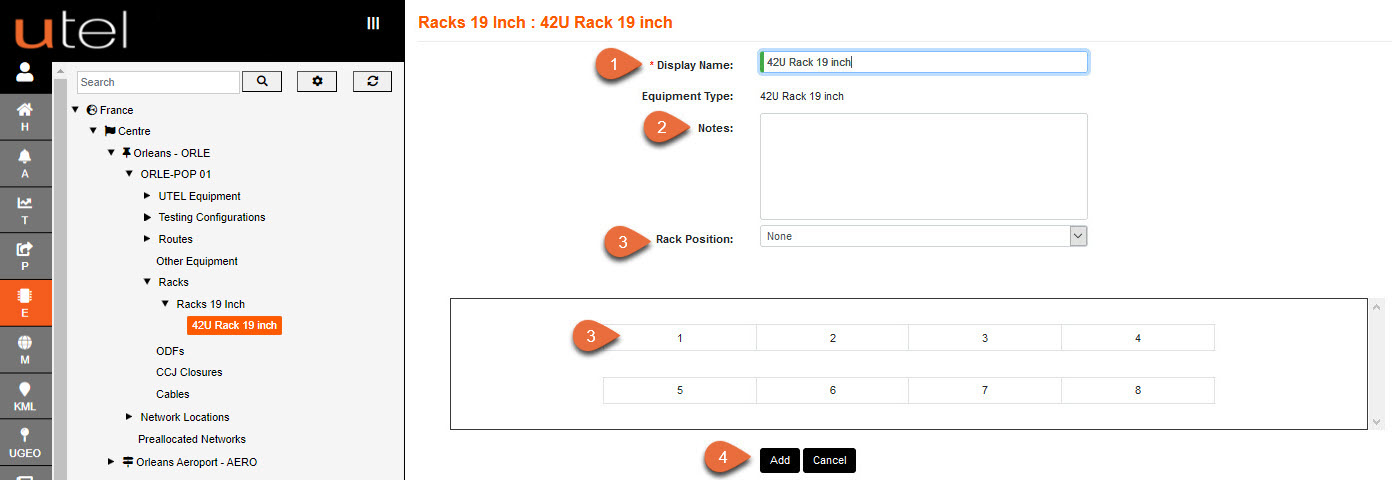
1.Enter the Display Name as you would like it to be displayed in the Tree.
2.Add any Notes if required.
3.Choose the Rack Position in the room scenario, either by drop down or box selection.
4.Once completed, to save this entry click Add. You will now see it displayed in the Tree.
To move away from this page without saving, select Cancel.
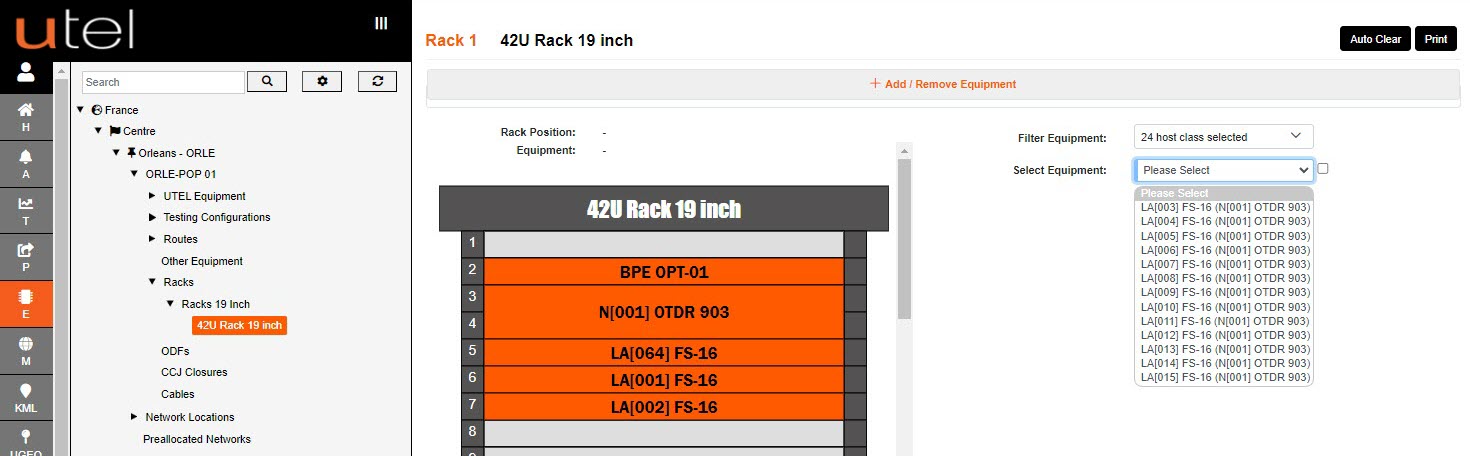
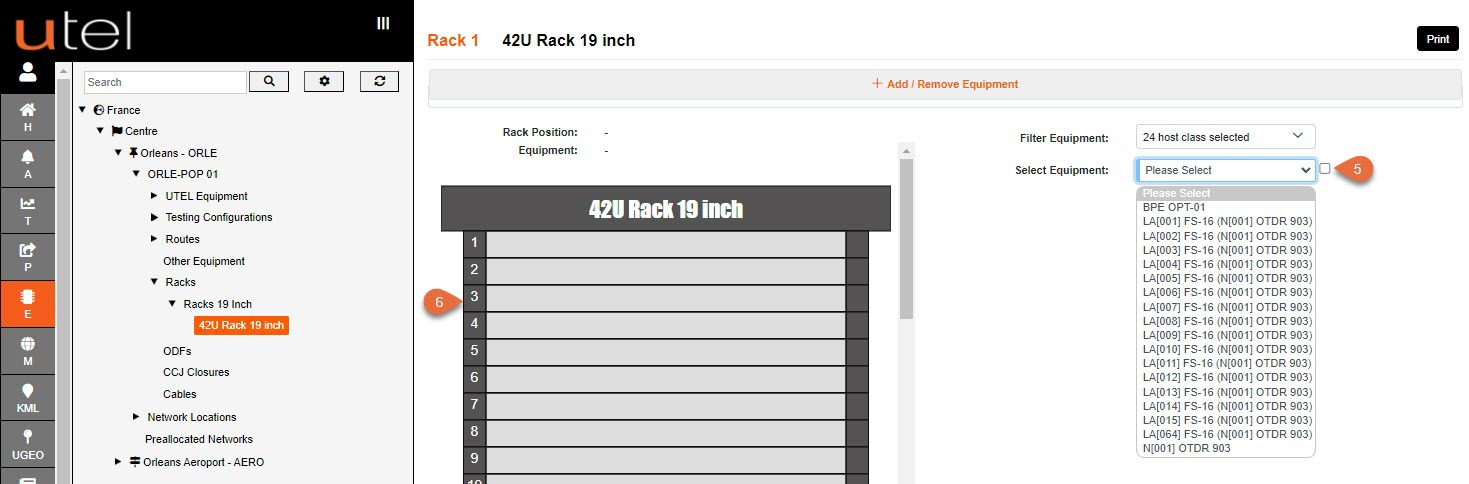
5.Choose the Equipment you would like to add to the Rack
6.Select the slot you would like to place the Equipment in.
In this example we will place the OTDR in the 14th 'U' slot.
The ODTR is now added to the rack, and this can be moved at any time - space providing.