Once a test has been run; each route has 10 tabs of information;
Route Details, Map, Planning Diagram, Test Details, Trace, Test Log, Alarm History, Assign Distances and Scheduler Status.
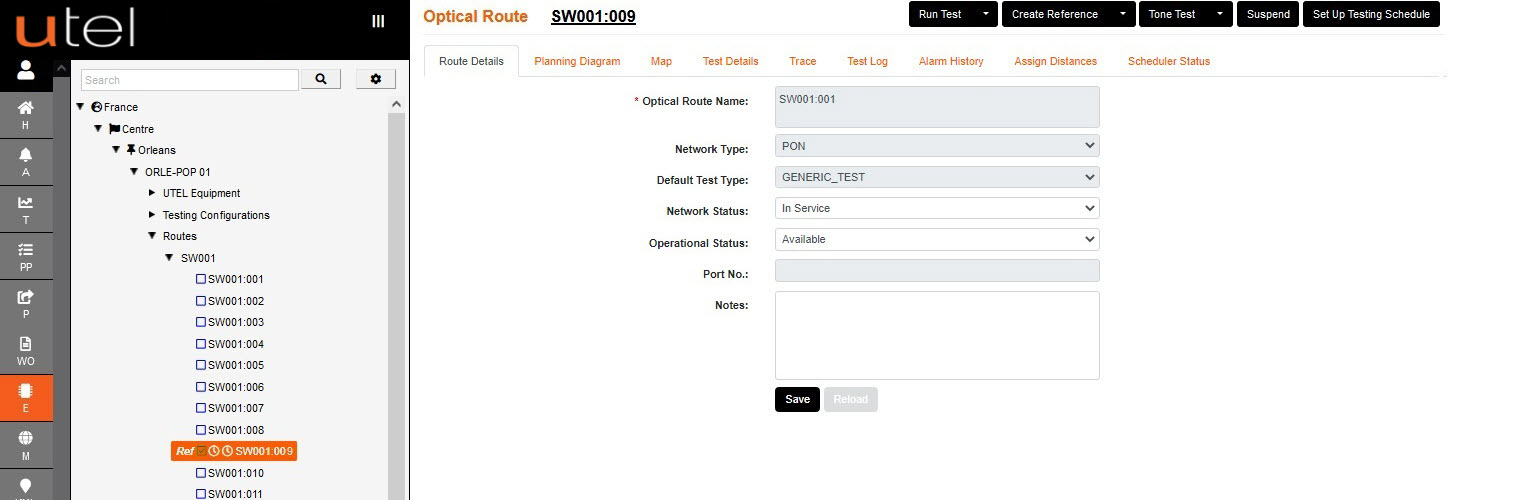
1.The Route Details tab allows you to set the Network and Operational Status, and add Notes.
If any other modification is required; the Route needs to be Suspended.
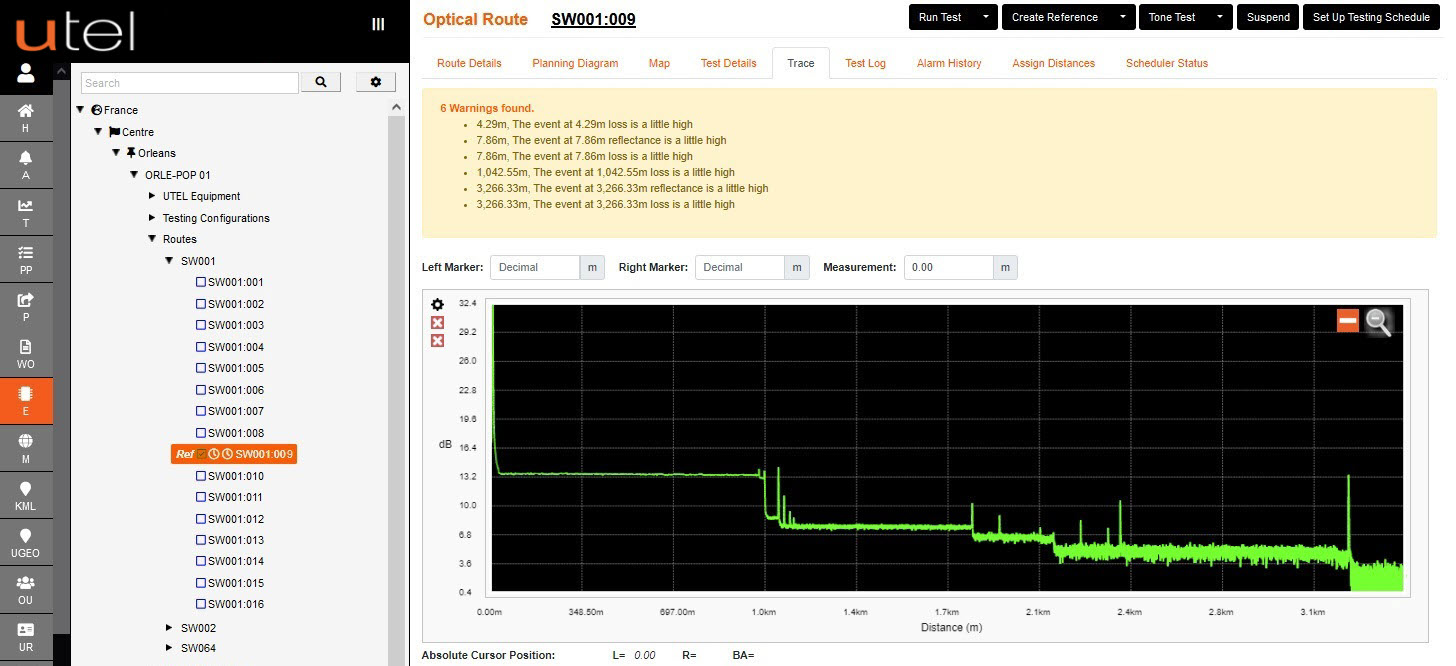
2.In the Trace tab, each event can be seen including the end points ie: ONT.
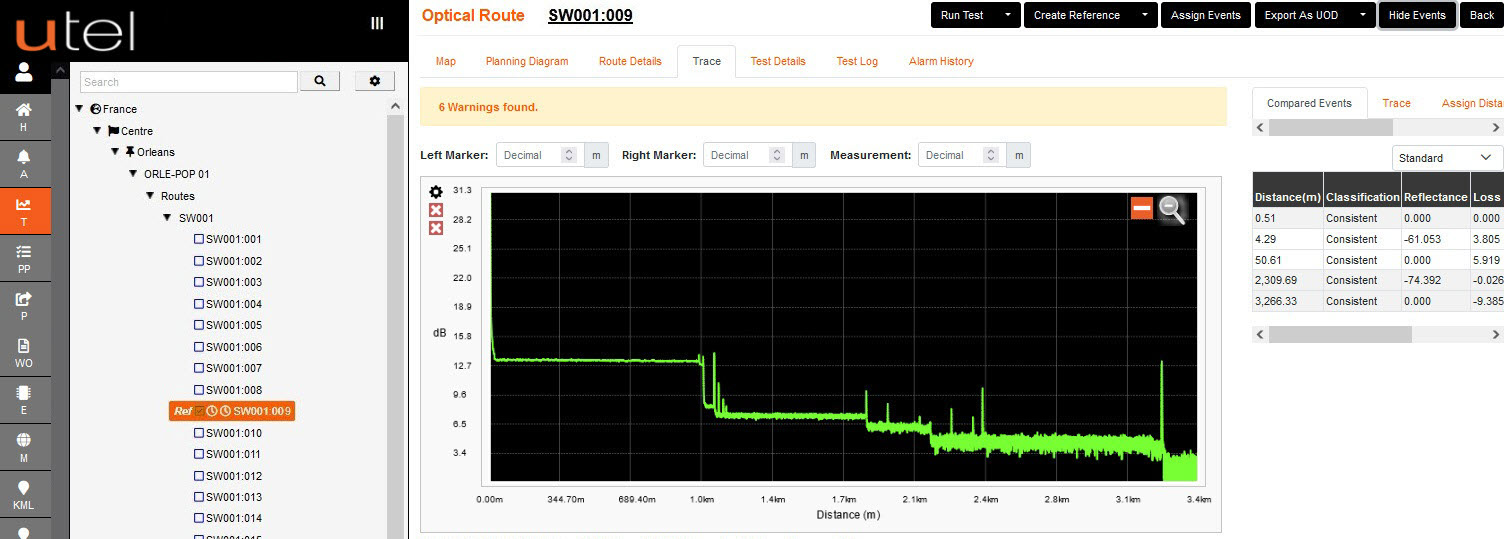
In 'T' the Key trace details, called events, are shown on the right displaying the distance and type of the event.
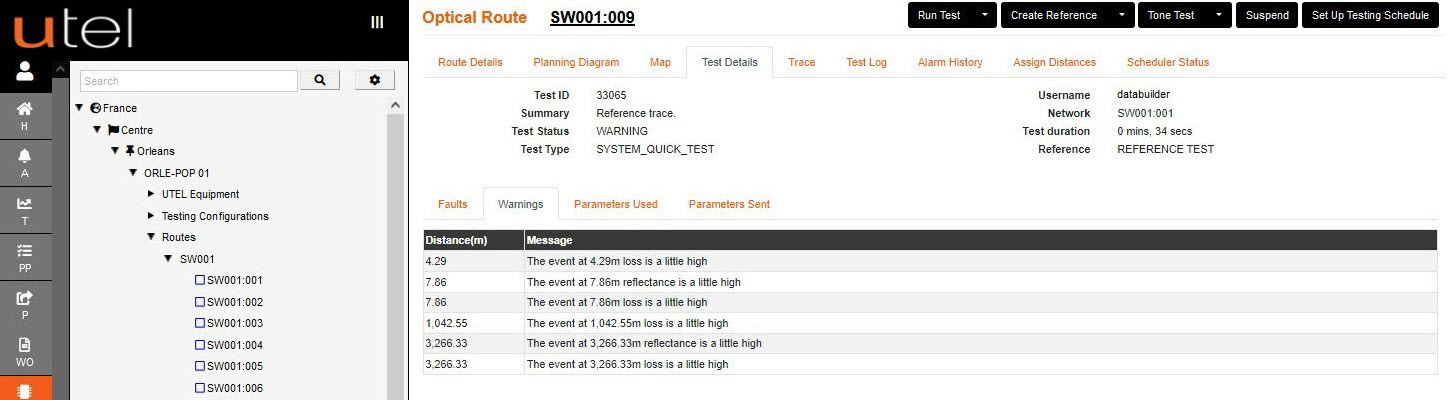
3.The Test Details tab shows in depth detail about the test; Faults, Warnings, Parameters Used and Sent.
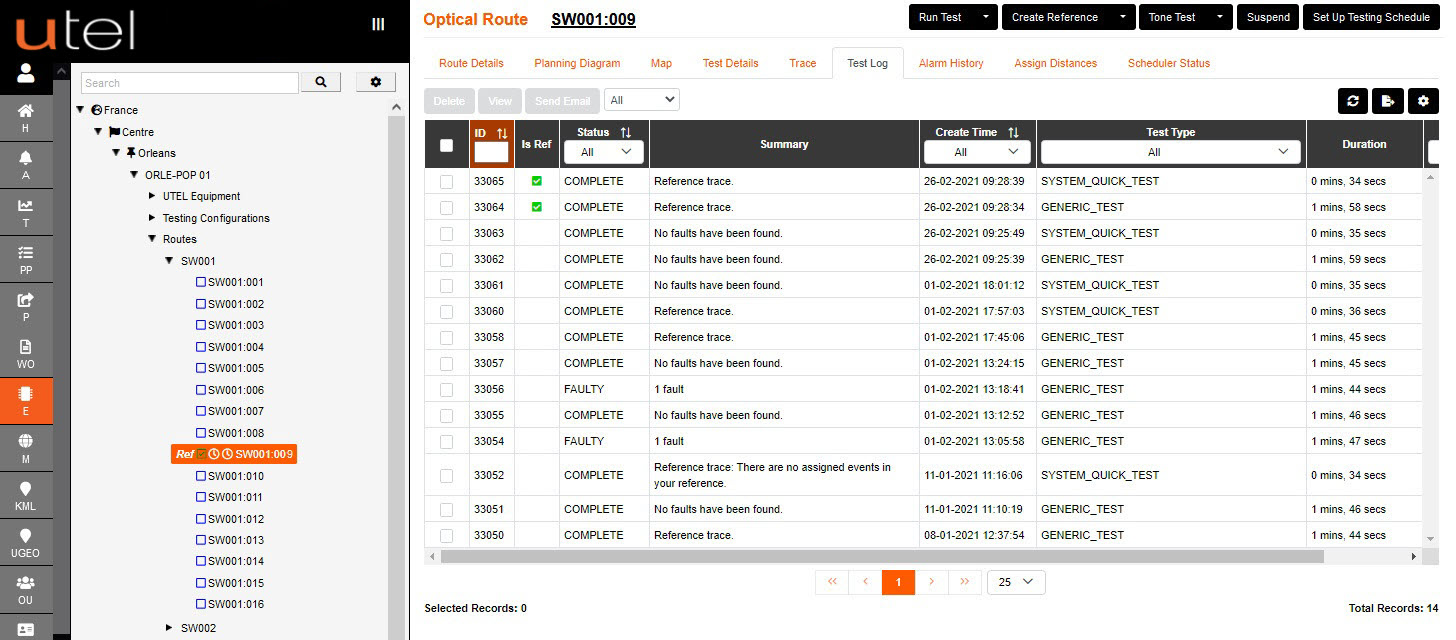
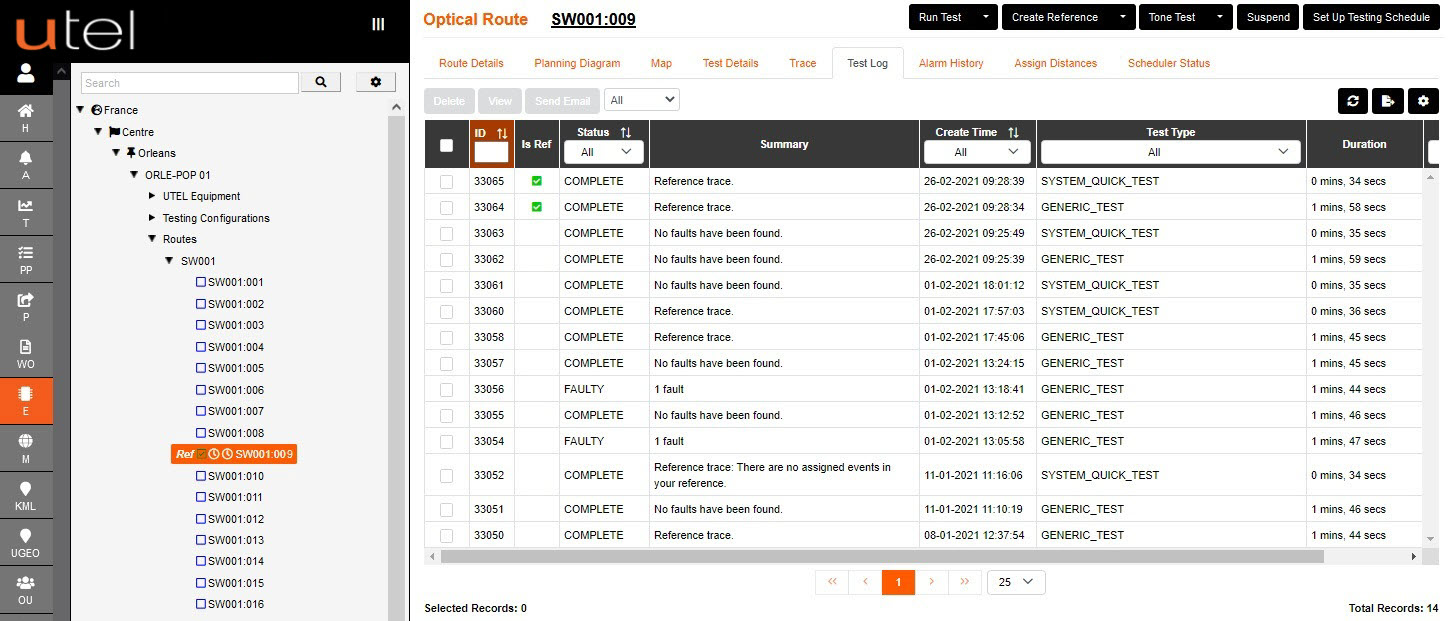
4.The Test Log tab shows the log of all the test results on the route.
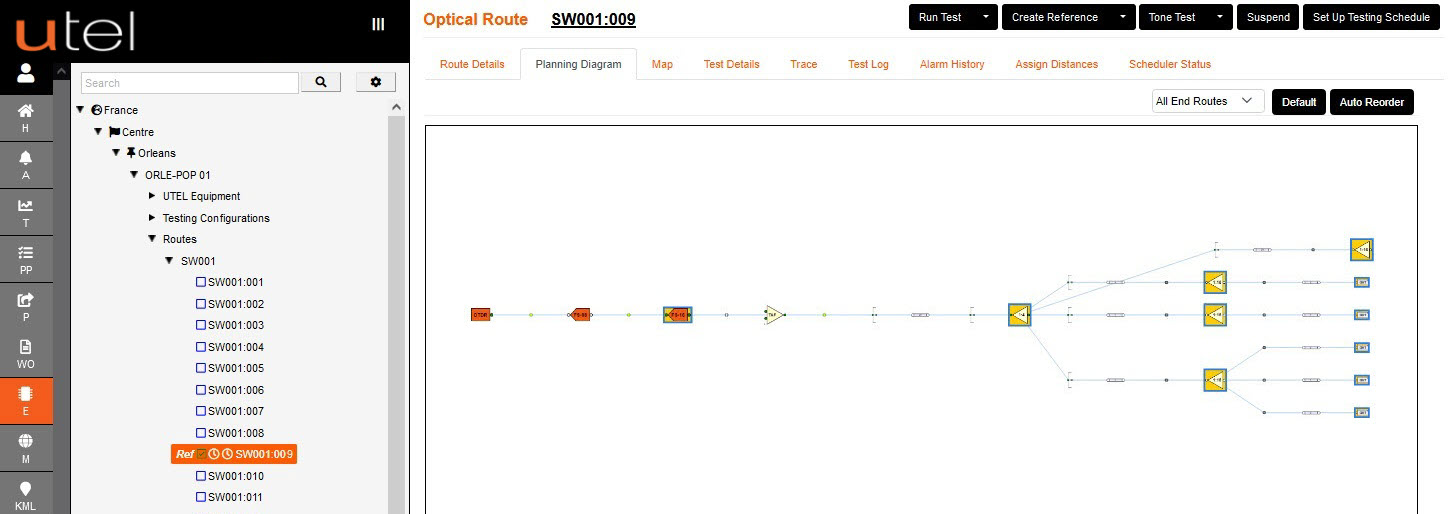
5.The Planning Diagram tab shows the paths that the fibers take from the TAF to the DP.
Any faults on the route will be indicated with a red cross on the component.
This will only happen if components have been assigned to events.
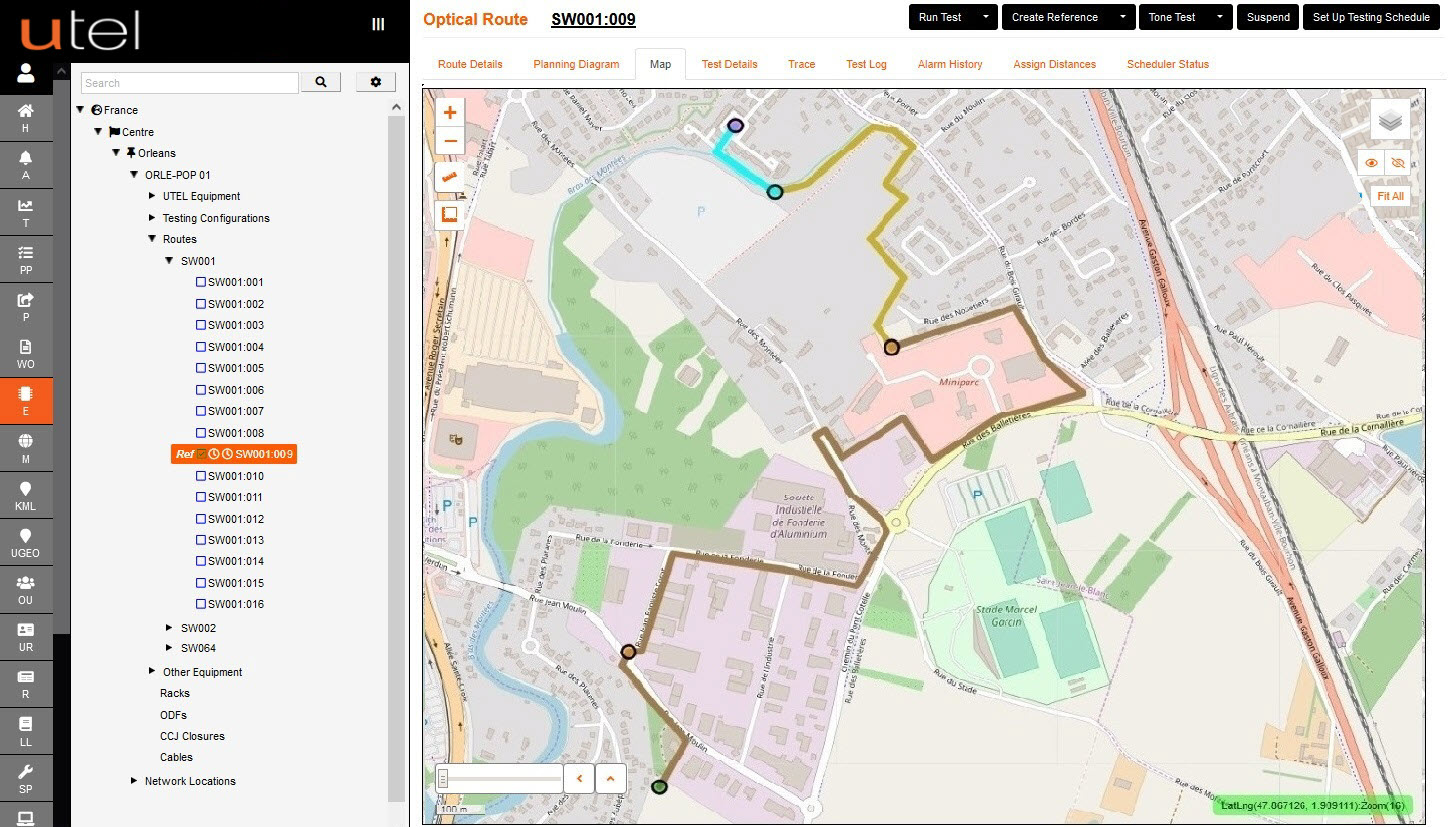
6.The Map tab shows the physical path that the fibers take from the TAF to the End Point.
Any faults on the route will be indicated with a red cross on the map, but only after assigning events.
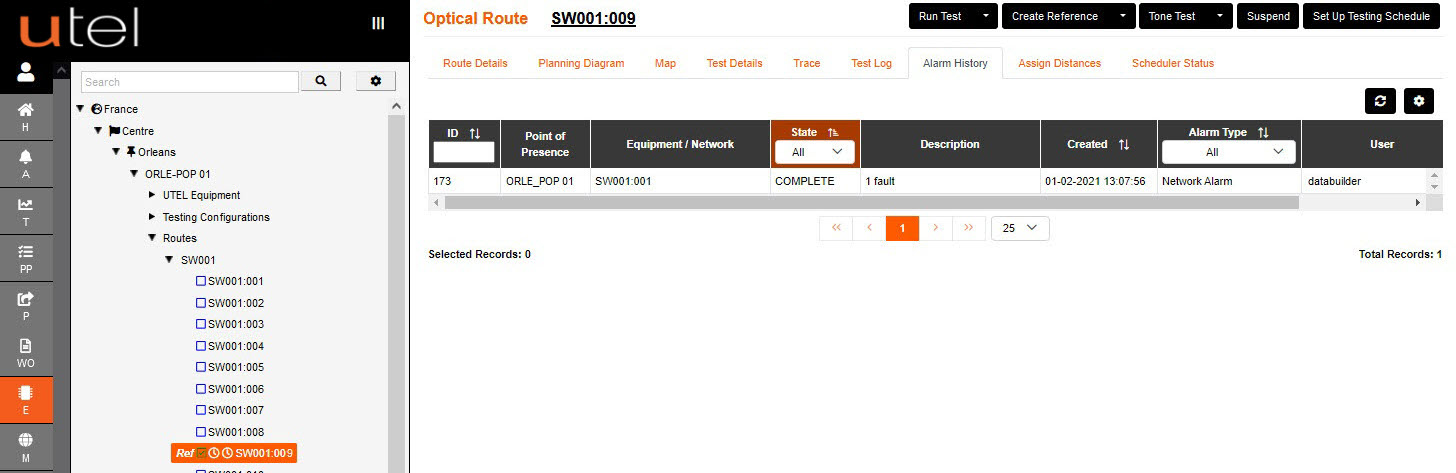
7.The Alarm History tab shows any alarms raised on the route.
8.The Schedule Status tab indicates the status of Schedule 1 and Schedule 2 set up on the route.
The status remains inactive until a schedule is set up or disabled.

9. The Assign Distances tab shows a list of the components that were assigned and their distances.
This is empty until the user assigns trace events to the relevant component.